

PingPlotter Cloud Manual
Track Agent Location
PingPlotter Cloud helps companies keep track of WFH employees' location when location matters. Many organizations have HR or SLA requirements for employees to work in a specific geographic region in order to stay compliant. Others have certified certain locations for remote work, like a home office. In a hybrid environment it is beneficial to know when an employee is on-site or if they are connected to the VPN or not. Here is how to configure PingPlotter Cloud to monitor for these changes.
Custom Fields
The easiest method is to create a new custom field to "lock" in their work location. This field is then compared against the "Location" that is auto-generated when the PingPlotter Agent connects. This is to ensure that Johnny is working from their verified work location and not some hotel in Vegas.
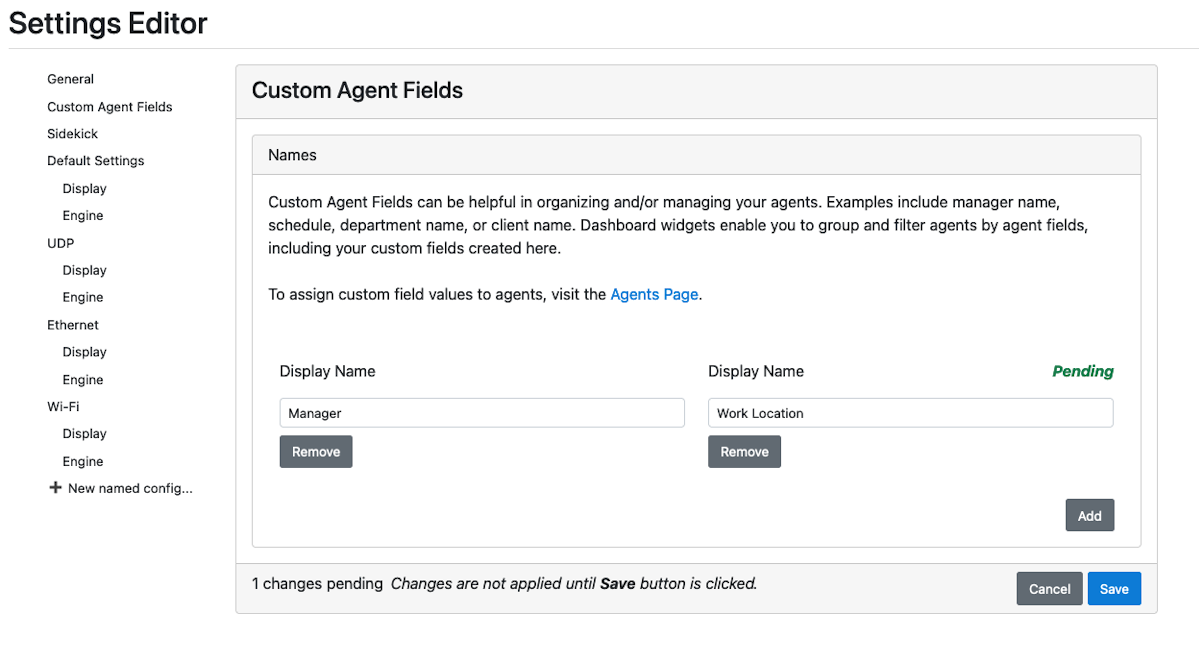
Create the new Custom Field by going to Manage --> Settings --> Custom Agent Fields and click Add. Give this new field a name like Work Location.
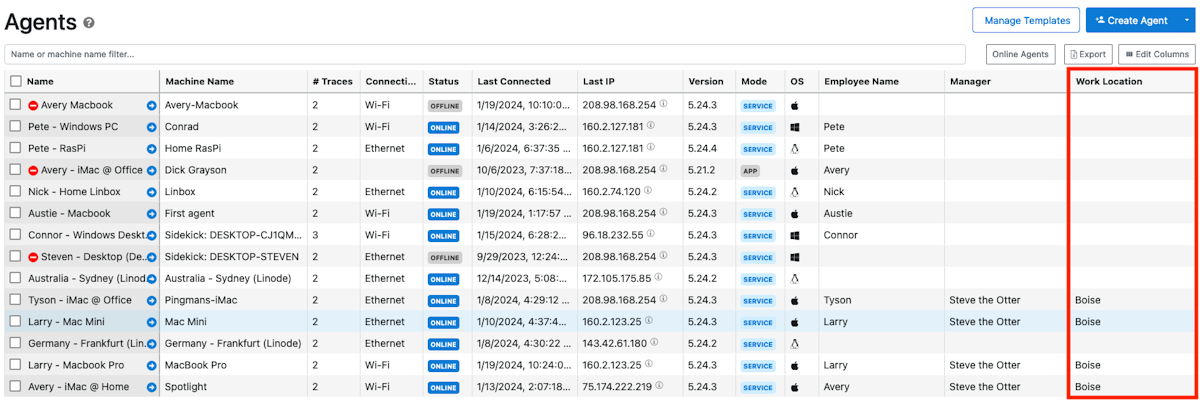
Now go to the Agents page and verify that a new column called Work Location is now visible. Double-click in the cell next to an Agent and type in their work location, e.g. Boise.
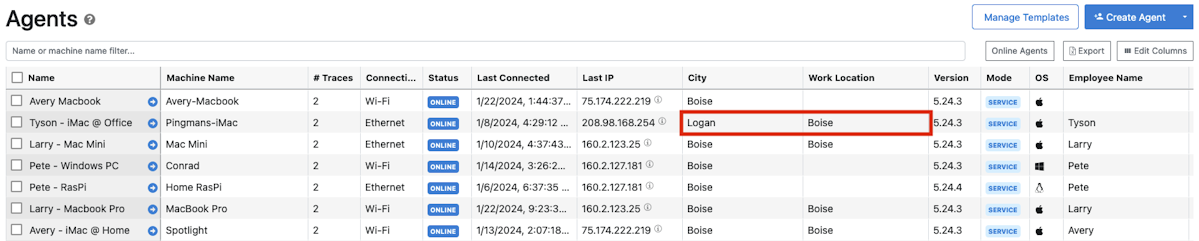
If your Agent ever reports issues with their connection, you can verify that they are still in Boise. Compare the City column (auto-generated based on the Agent's public IP Address) against their stated Work Location. Are they the same? If not, the Agent has most likely changed locations.
Alerting Based on Location
If you are in a situation where you want to track when an Agent's location changes, then you can do this using the IP Address in Route Alert. You'll want to "look" for the Agent's Gateway IP (hop 1) and be notified if that ever changes.
- Click on Alerts in the left-sidebar and then + Create a New Alert in the upper-right.
- Select IP Address in Route and type the Local IP Address of the Agent's Gateway (Router) in the IP Address field.
- Select Add a Comment as one of your Actions.
- Change Notify when to When alert conditions end.
- Type the comment in the Comment text field, e.g. Location changed!
- In the Targets section, select Select Targets.
- Check the box(es) next to the Agent you are tracking.
- Give the Alert a name, and select Create Alert, e.g. "Track Tyson".
A comment will now be added to the timeline graph whenever the Agent leaves their main work location.
Add as many actions to this Alert as needed.
Note!
This Alert would also trigger if the Agent connects to a VPN, or swaps out their router.
VPN/In-Office Tracking
The same method used above can also be used to track when an Agent connects/disconnects from the VPN, or enters/leaves the office. In this case though, you'll want to "look" for the VPN Gateway IP Address and or the office's gateway IP.
- Click on Alerts in the left-sidebar and then + Create a New Alert in the upper-right.
- Select IP Address in Route and type the Local IP Address of the VPN/Office Gateway (Router) in the IP Address field.
- Select Add a Comment as your Action.
- Type the comment in the Comment text field, e.g. VPN connected!
- Click + Add Action.
- Select Add a Comment as the Action.
- Change Notify when to When alert conditions end.
- Type the comment in the Comment text field, e.g. VPN disconnected!
- In the Targets section, select Apply IP Mask.
- Type ALL in the text field to apply the Alert to all of your Agents.
- Give the Alert a name, and select Create Alert.
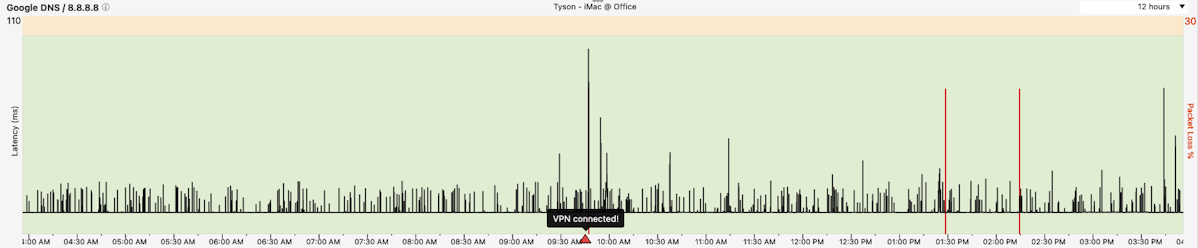
Everytime your Agent connects or disconnects from the VPN, a new comment will be added to the timeline graph. This will allow you to easily see what the status of the VPN was if you ever need to troubleshoot past events.