

PingPlotter Cloud Manual
Create a Manager Dashboard
Creating a Dashboard for each of your managers will make it easy for them to keep an eye on their Agents. They will have a view that only shows information that is relevant to them making it easy to keep their team running as efficiently as possible.
Creating the Custom Field
The first thing you need to do is create a custom field to identify each Agents' manager.
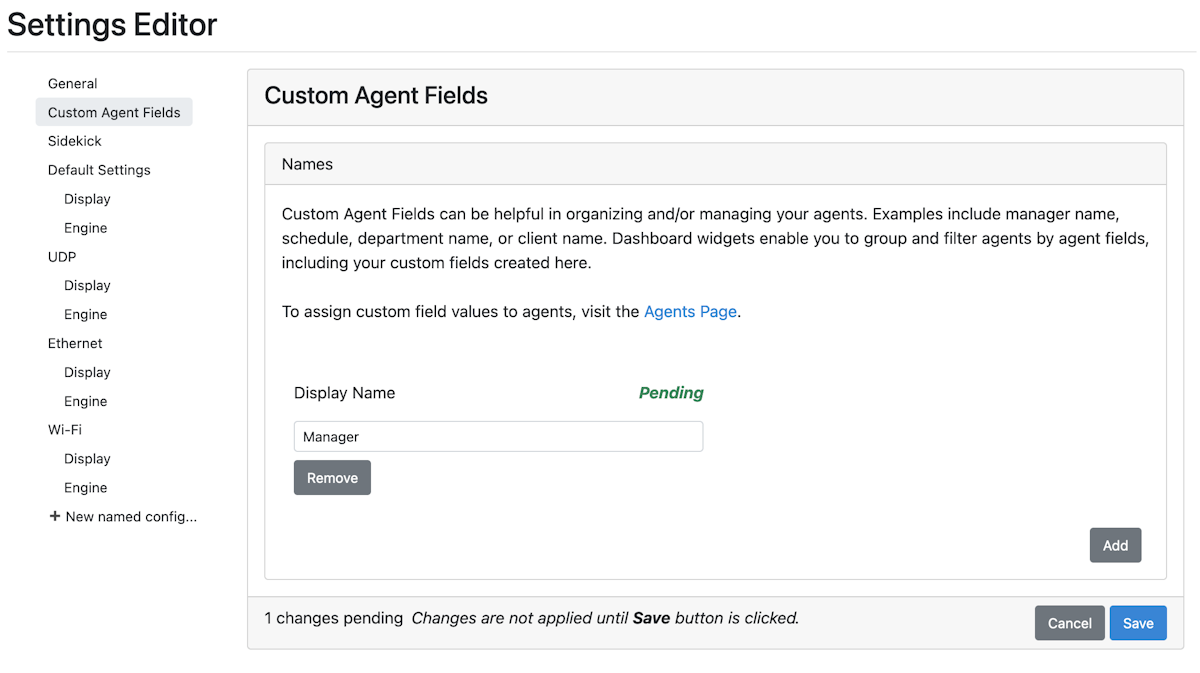
- Go to Manage → Settings → Custom Agent Fields.
- Click Add to add the new field.
- Type Manager in the Display Name field.
- Click on Save.
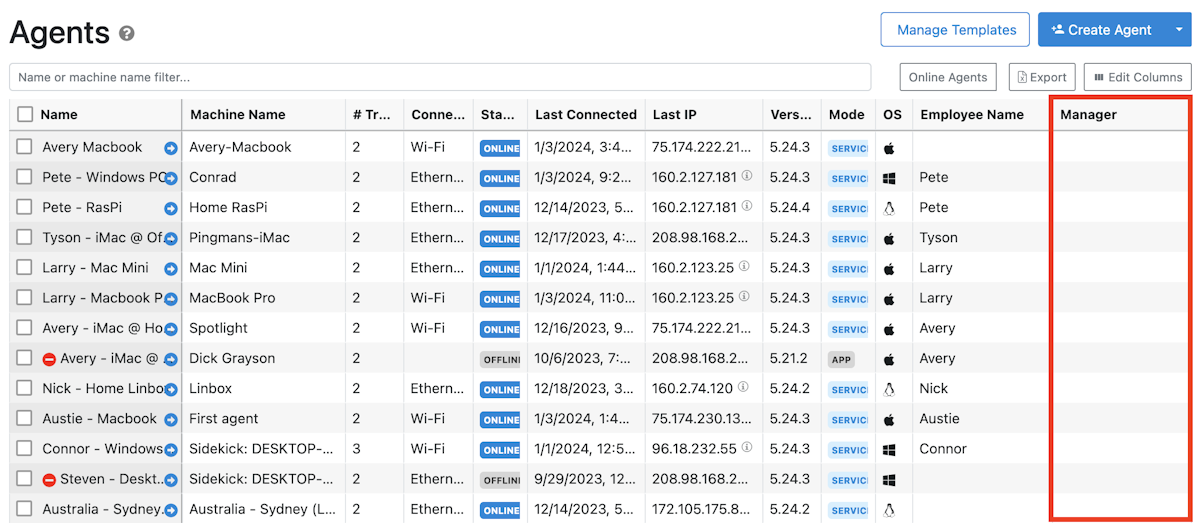
Head to the Agents page to verify that a new column called Manager shows in the Agents table.
Update the Agents
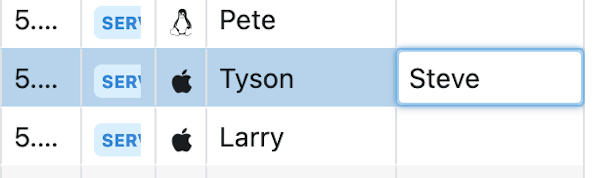
Double-click in the Manager cell to update the field with their manager's name, e.g. "Steve."
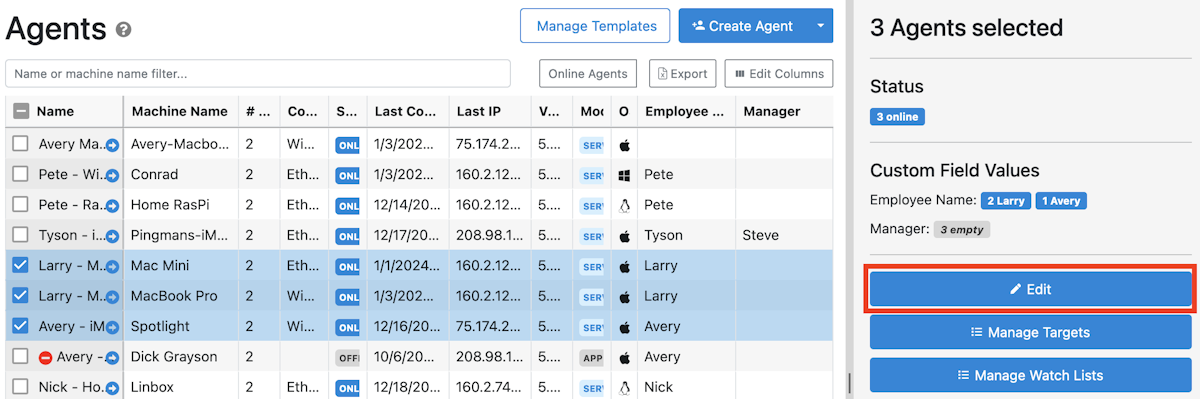
Bulk update Agents using the multi-select boxes on the left. Select the Agents then click Edit in the right-panel.
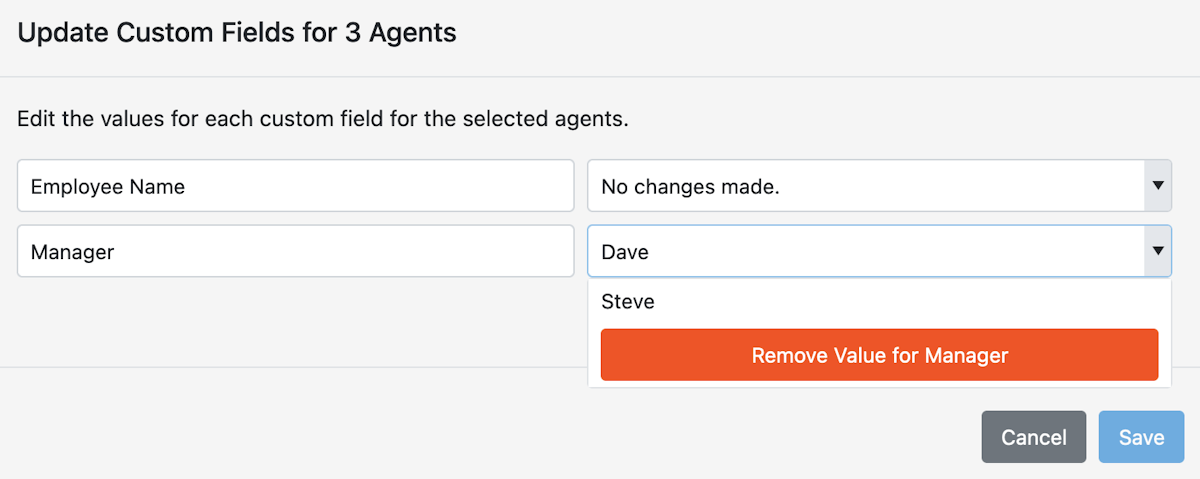
Type the name of the Manager in the right text box or select a value from the drop down and hit Save.
Create the Dashboard
We're now ready to create the Dashboard. Click on Dashboards twice to open the dashboard management page.
Select + Create Shared Dashboard.
Use the manager's name as this Dashboard's name, e.g. "Steve", and hit OK.
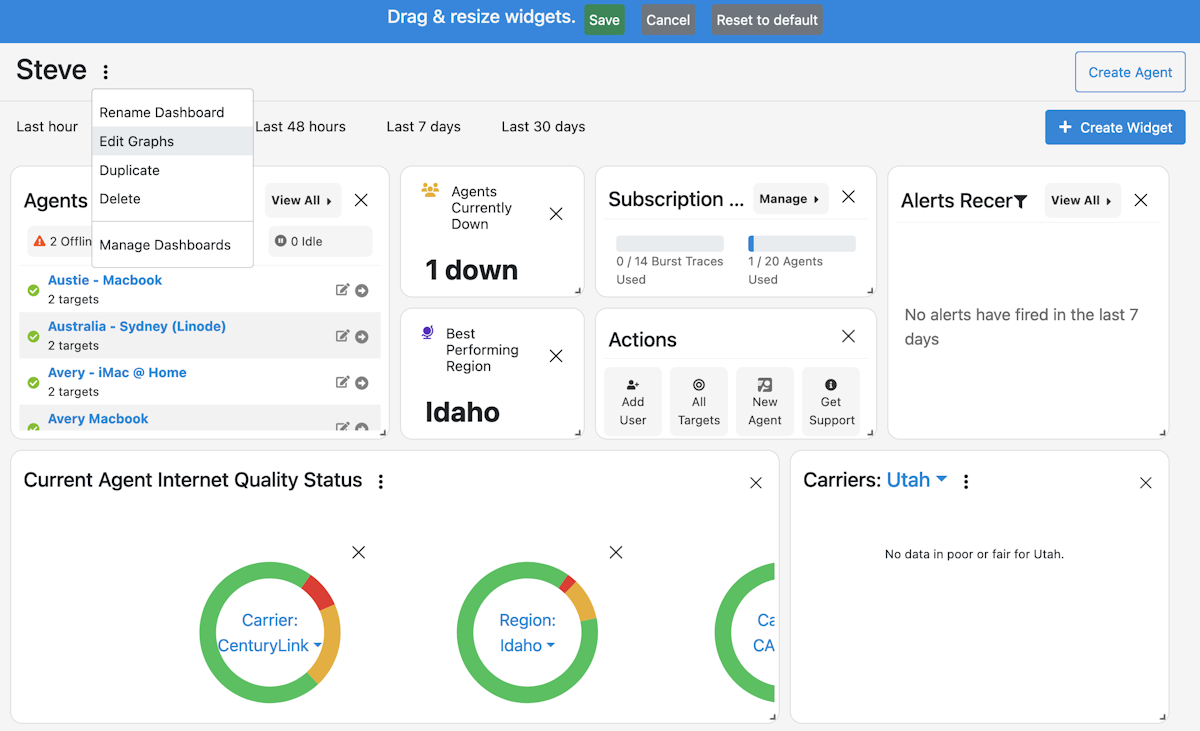
Open this Dashboard, click on the three dots next to the name and select Edit Graphs. Delete all of the widgets on this page by clicking on the "x" in the upper right of each box and hit Save at the top.
Now that we've got a blank slate we can build our masterpiece.
Add Widget(s)
The most important part of the widgets we add is the filter we apply.
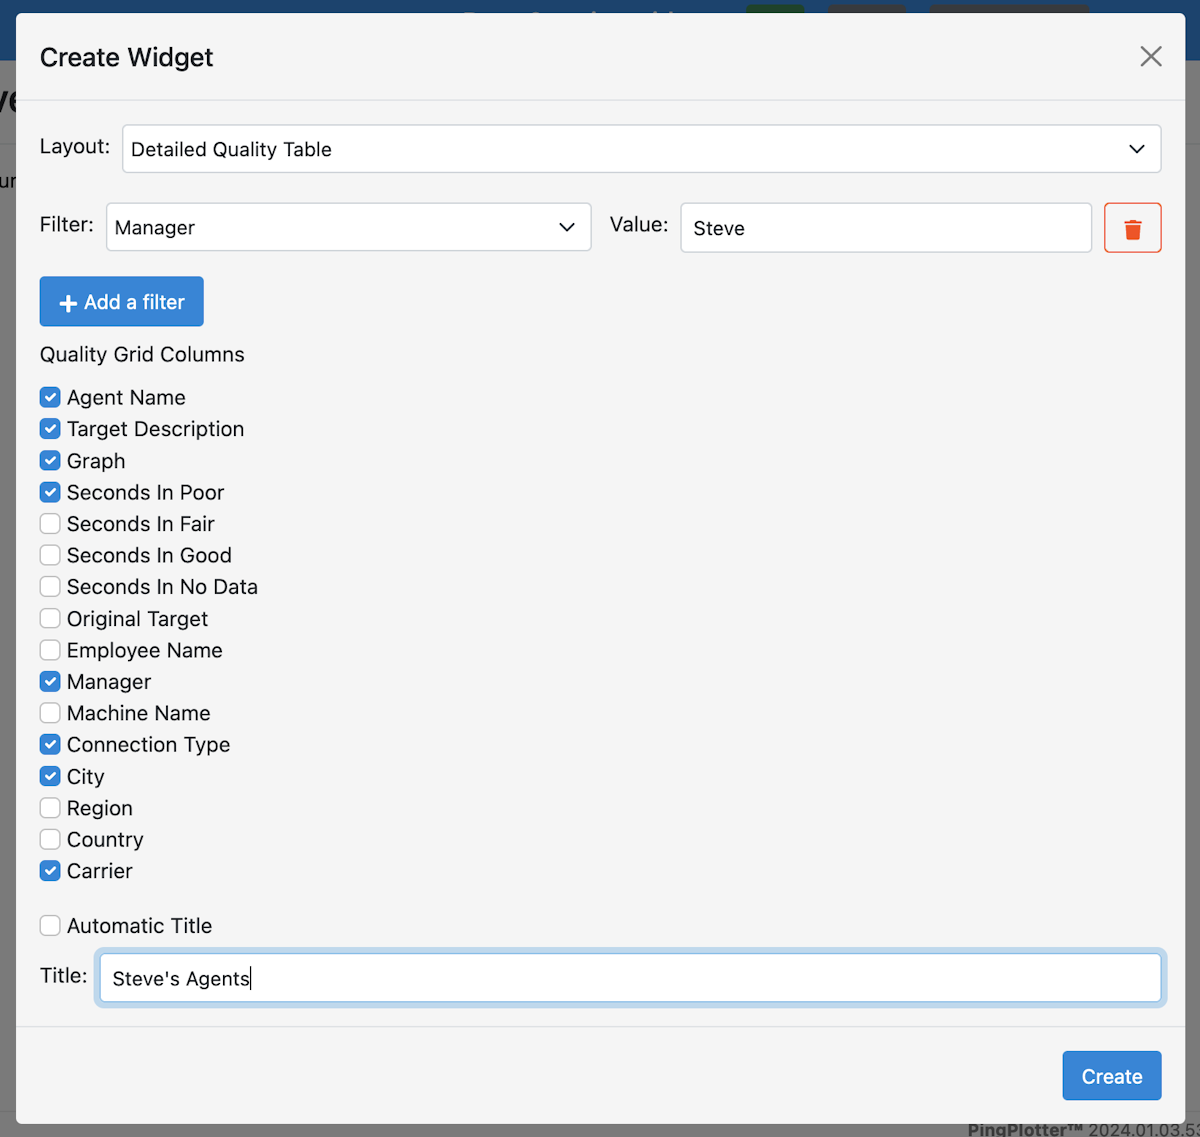
- Click + Create Widget in the upper-right.
- Select the Detailed Quality Table layout.
- Select + Add a filter.
- Choose Manager from the Field dropdown. Then type the manager's name in the Value field, e.g. "Phil".
- Check the Agent Name, Target Description, Graph, Seconds in Poor, Manager, Connection Type, City, and Carrier boxes (and any other info you want to see).
- To change the title of this widget, uncheck the Automatic Title checkbox and type the name in the text field, e.g. "Steve's Agents."
- Select Create.
- Reposition the widget by clicking and dragging.
- Resize the widget by clicking and dragging on the bottom-right corner.
- Hit Save when you've finished making your changes.
Note!
Be sure to add your managers as users on your account! Give them read-only access by selecting no permissions upon user creation.