PingPlotter Sidekick
Getting Started Guide
Congratulations on taking your step toward solving your network problem! The next part of this process involves:
- 1. Configure the Sidekick agent.
- 2. Collect a bunch of data.
- 3. Analyze that data.
- 4. Solve the problem.
The entire goal here is to help you identify what is causing your network issue. By the end of the 28 days you should have the information you need to solve the problem yourself, or build a case so that someone else (e.g. your service provider) can solve it for you.
Configure
When you first open your Sidekick link you'll be take to the Configure page. From here you'll be able to do things like install the agent and Reset Traces.
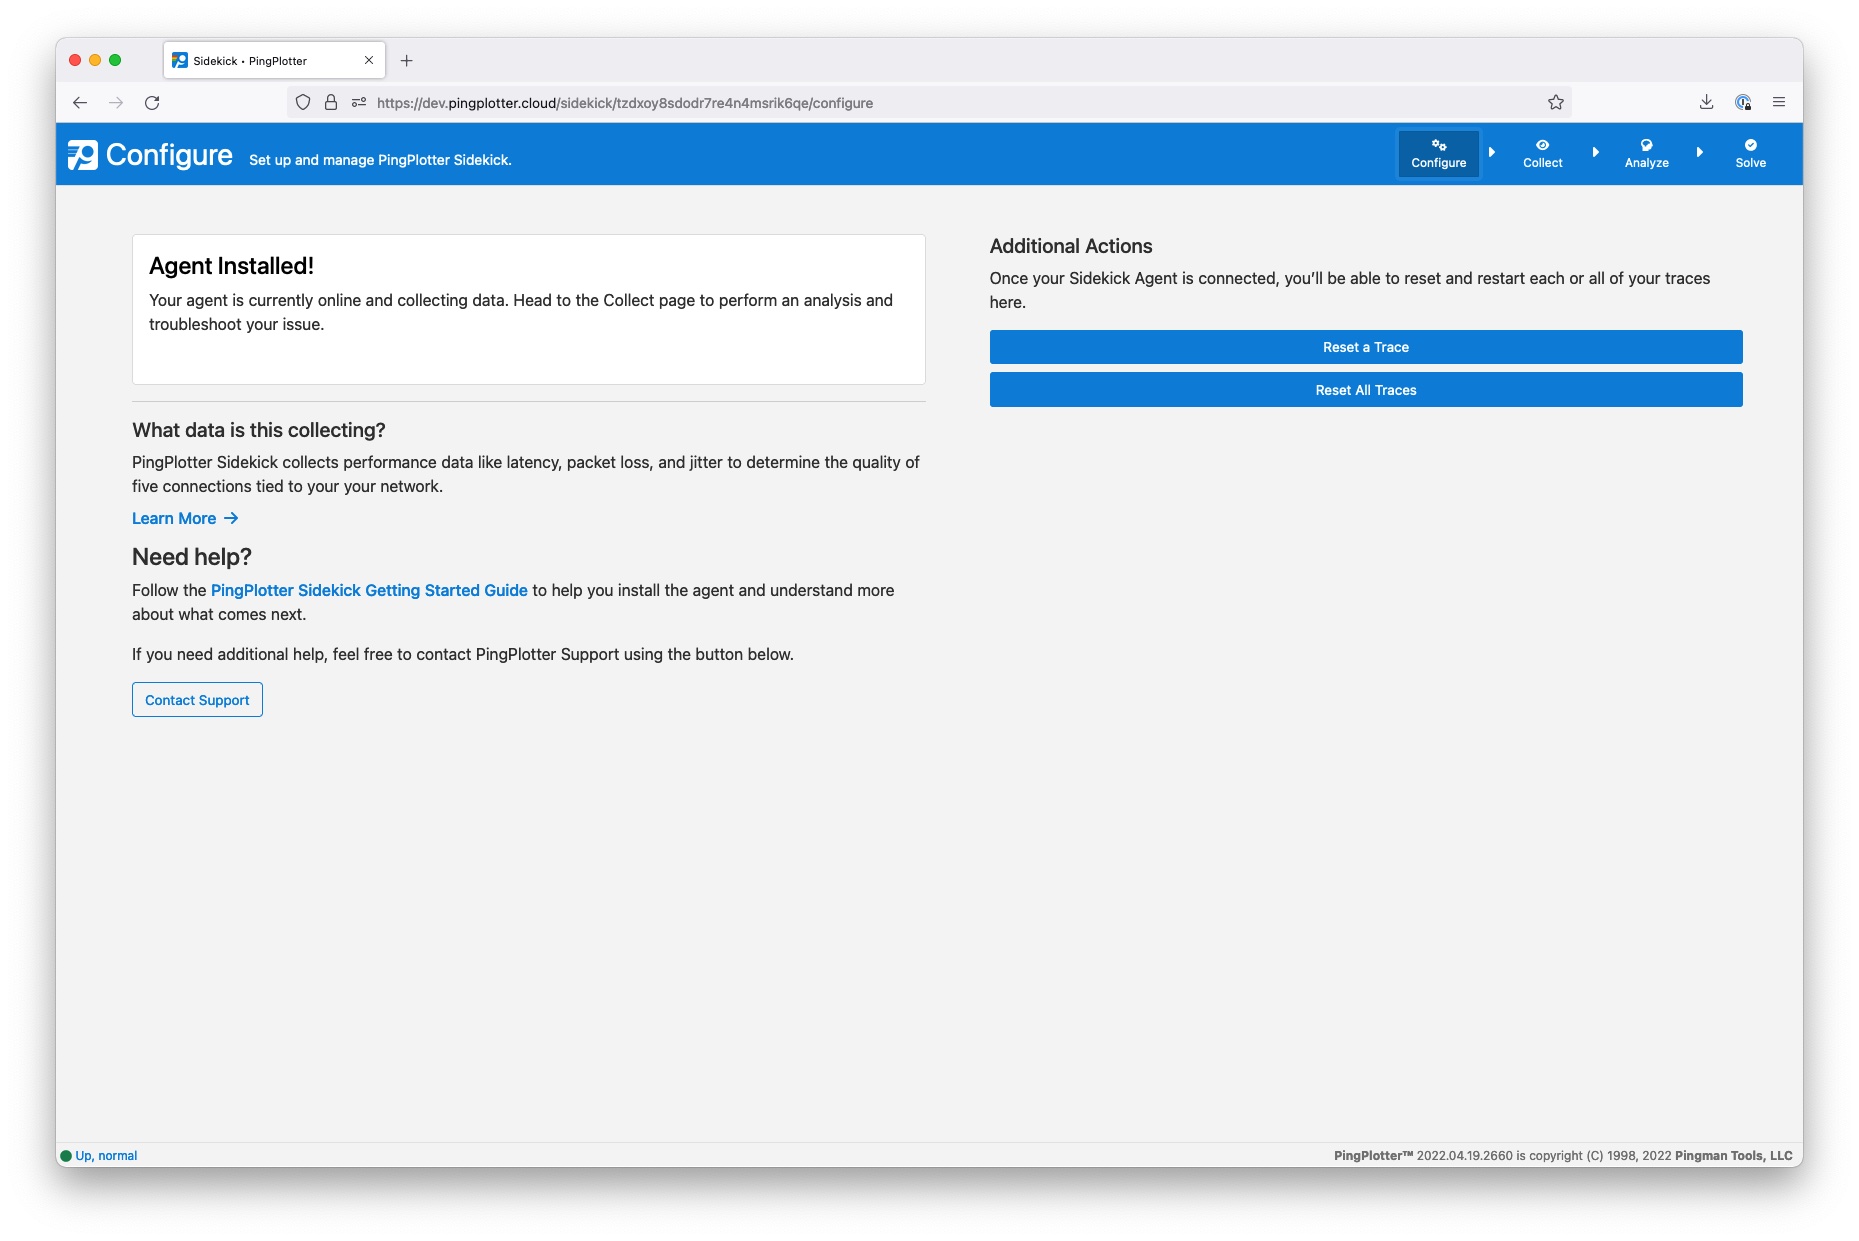
Click on the Download Agent button to download the Sidekick Agent installer. An agent is available for Windows and Mac operating systems. You can download the installer for a different OS by clicking on the dropdown arrow. There is also an option to Copy the Link to this page so that you can easily access it on a machine to which you are remotely connected.
After downloading the agent, you'll need to install it.
Windows Installation
- 1. Run the installer by double-clicking on the pingplotter_agent.exe file from your Downloads folder, accessible via Windows Explorer.
- 2. The Installation Wizard will open. Click Next --> Next --> Install.
- 3. A small window will pop up (User Account Control) that says, "Do you want to allow this app to make changes to your device?" Select Yes.
- 4. Select Finish.
MacOS Installation
The MacOS agent is downloaded as an application in a .zip file. You'll simply unzip the file, and then run the application.
- 1. Double click on the pingplotter_agent-MacOS.zip file from your Download folder, accessible via Finder.
- 2. A new file will appear in your downloads folder - the PingPlotter application. Double-click to open the application.
- 3. A pop-up will show asking if your sure you want to open it. Select Open.
- 4. PingPlotter will open another pop-up asking, "Move to Applications folder?" Select Move to Applications Folder.
- 5. If you are prompted to, enter your password (the one you use to log in to your Mac) and then hit Enter.
- 6. PingPlotter will open and confirm that the Sidekick Cloud agent has been installed.
Note
The agent machine needs to be able to connect to https://connect.pingplotter.com. The network will also need to have Websockets enabled. Click here for the full list of system requirements.
Collect
When your Sidekick agent is installed and online it will automatically refresh to the Collect page and start collecting data. It will test 5 endpoints:
- 1. Current Device - the machine where you installed the agent
- 2. Secondary Device - another device on your network
- 3. Your Router - the gateway to the Internet
- 4. Google DNS - a reliable external target
- 5. Cloudflare DNS - a second reliable external target
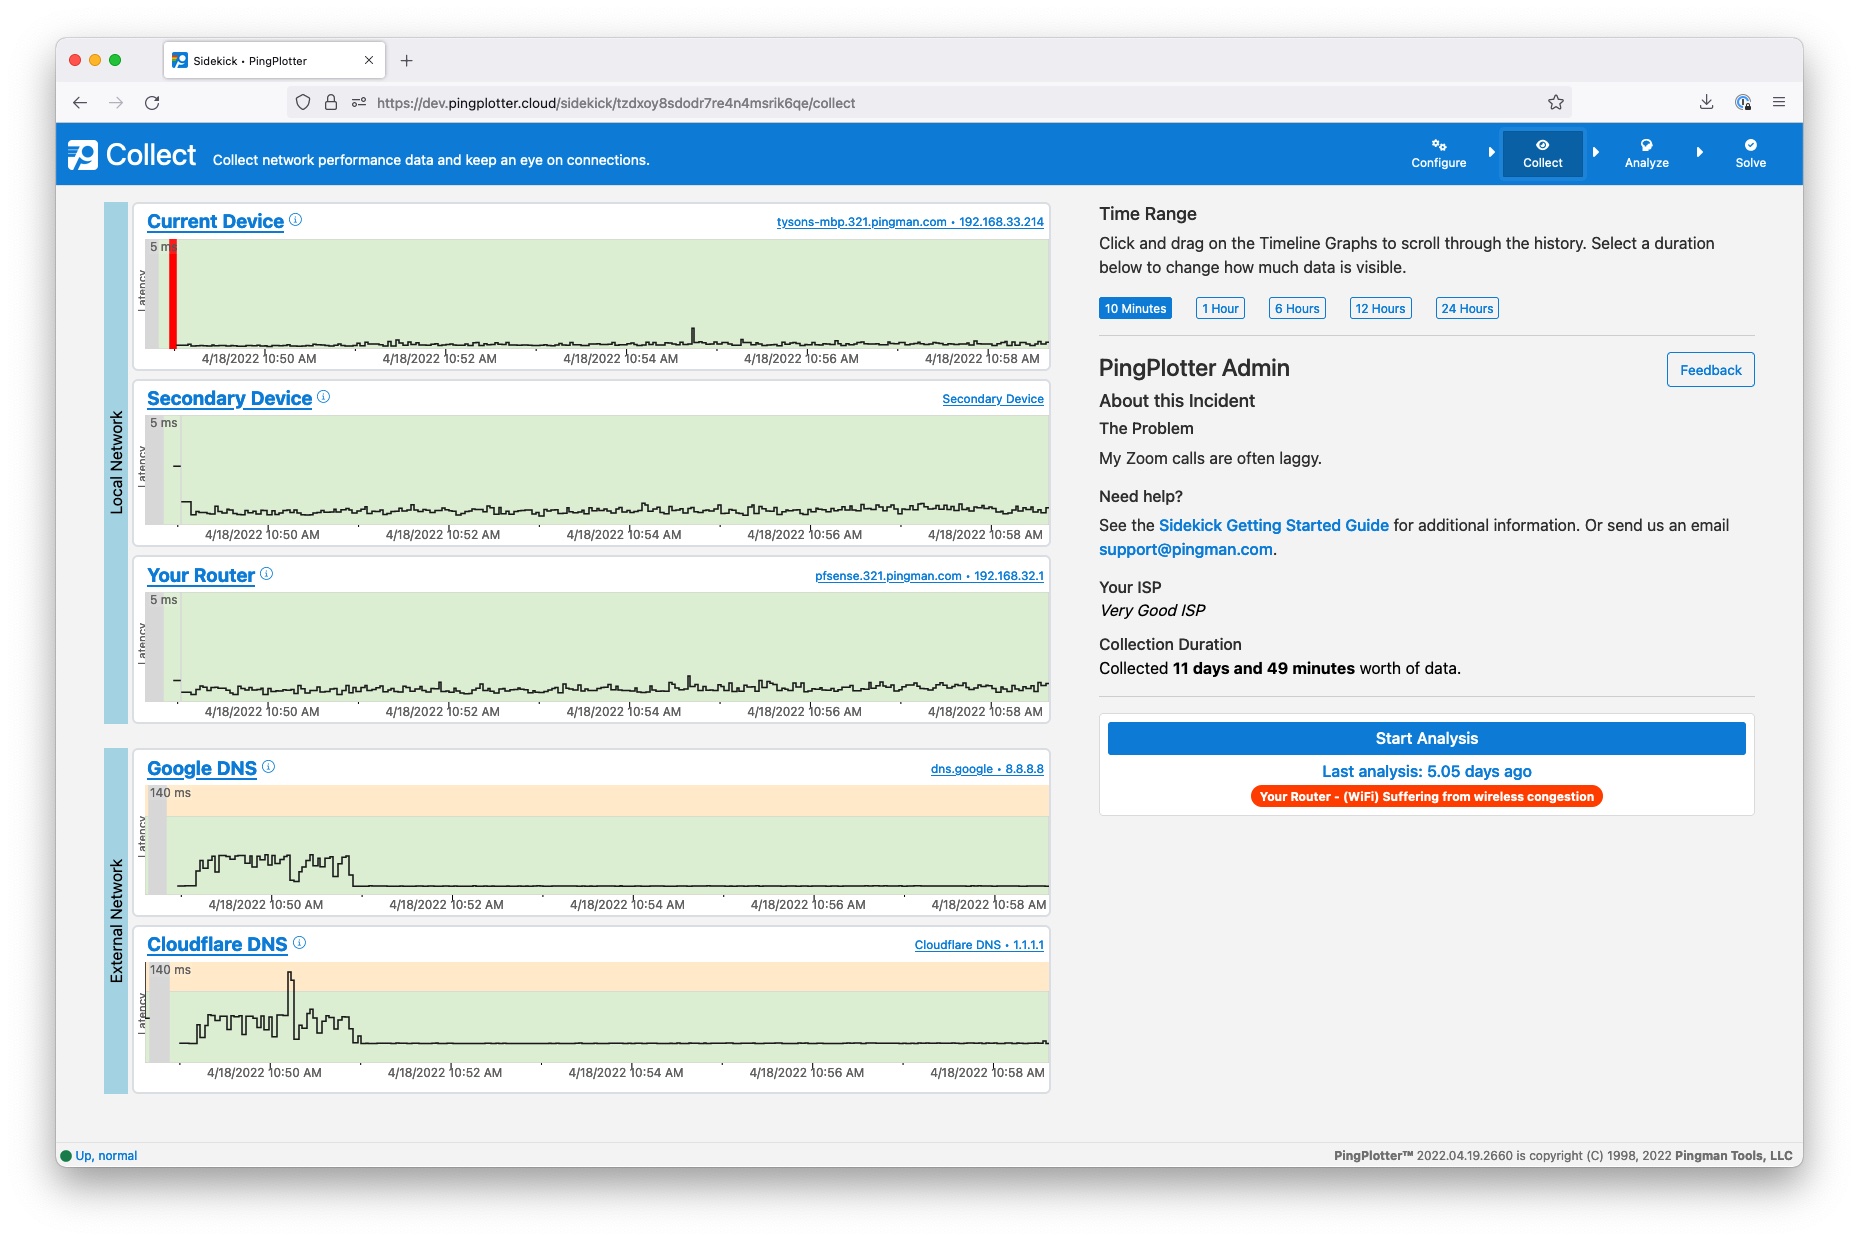
The Sidekick Agent will continue to collect data in the background as long as your computer remains powered on. Be sure to turn off sleep mode for best results!. The best thing you can do now is to try and reproduce whatever problem you were experiencing. Whether that be lag while gaming or buffering while streaming. Try to make it happen again so that Sidekick can capture the network performance while the problem is happening.
You'll need to collect at least 10 minutes of data to Start an Analysis, but the more you collect, the more accurate diagnosis you'll receive. Clicking on this button will take you to the Analyze page where you'll start really digging into your data.
Analyze
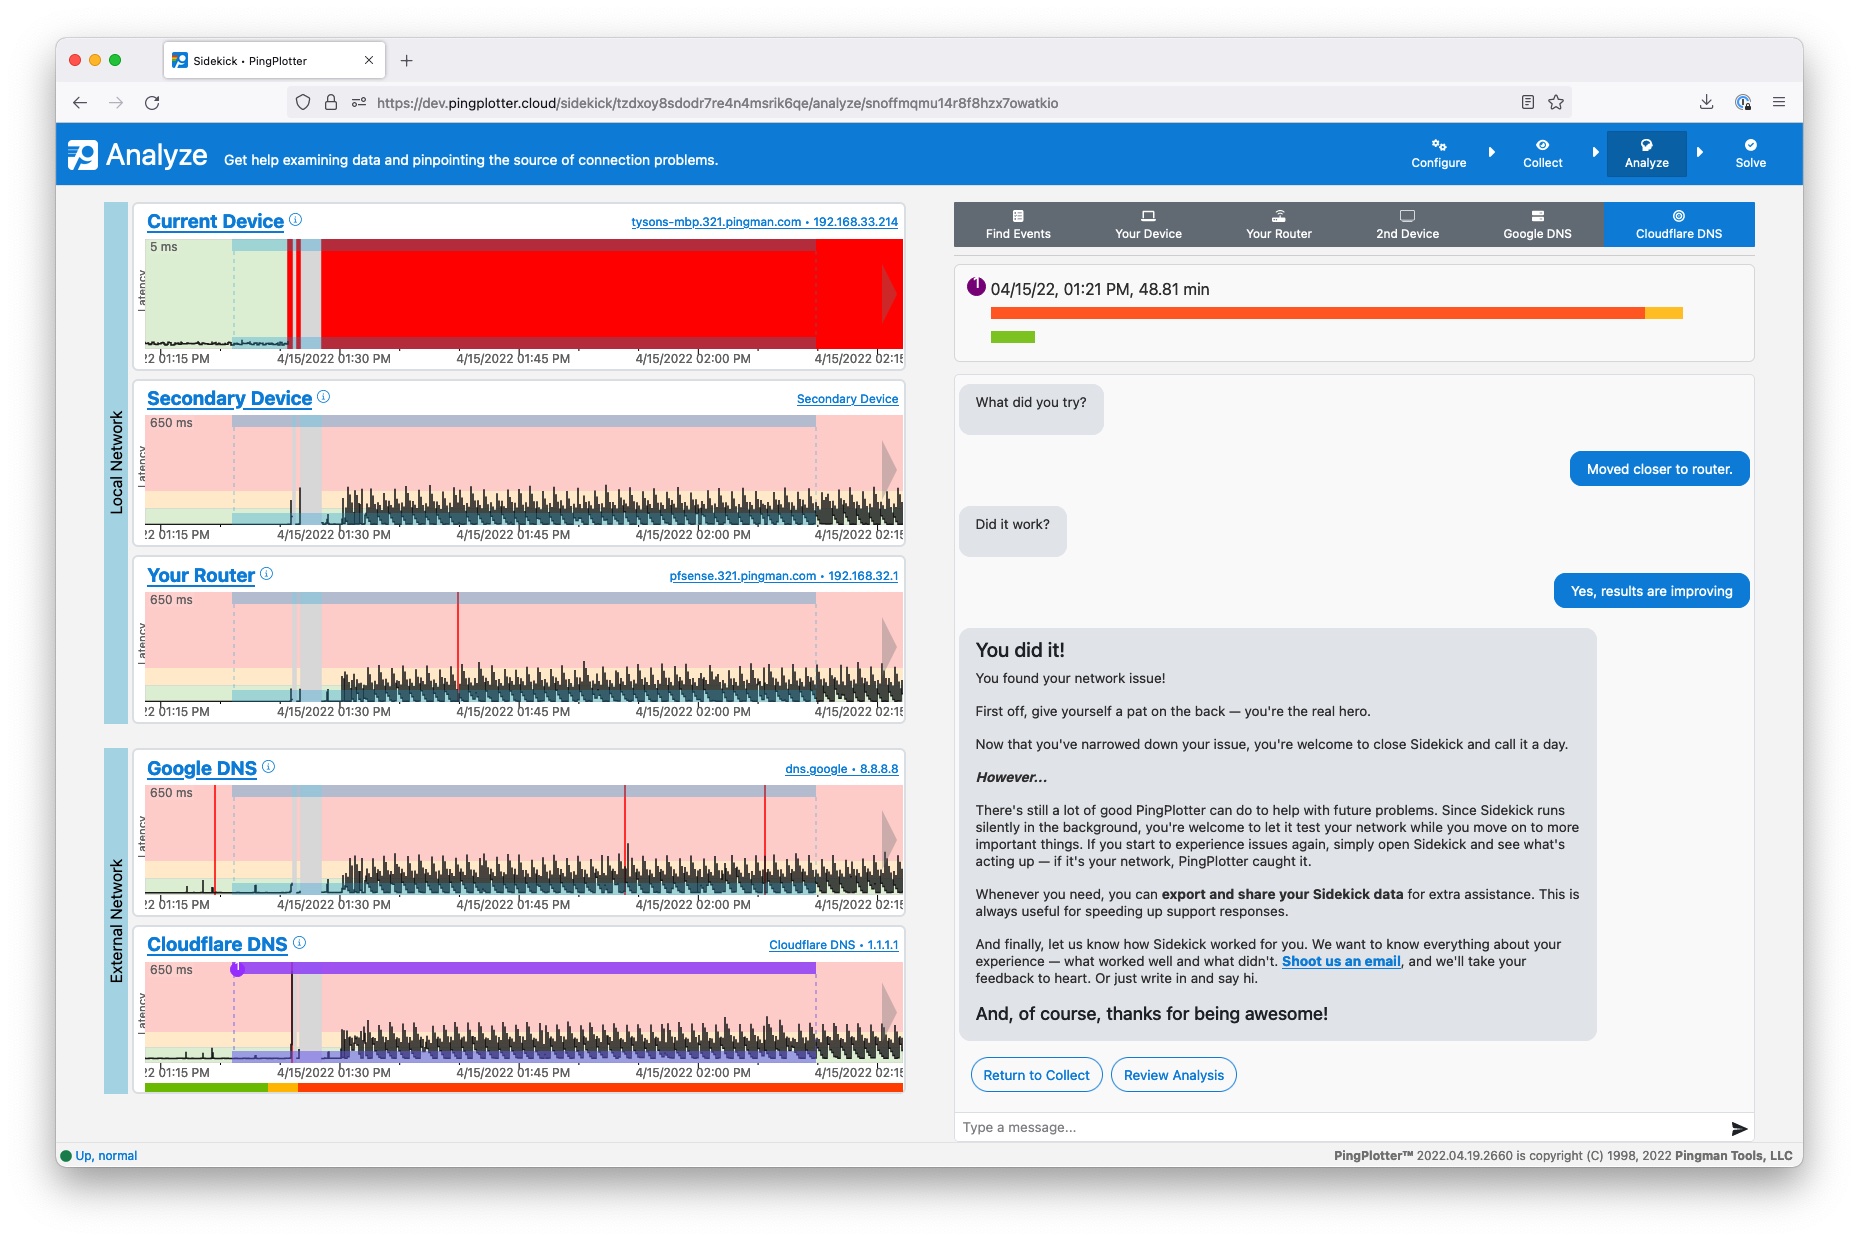
Sidekick will do a quick scan of your data and pick out 3 network events that could be contributing to the problem you are experiencing. Select one of these events to learn what could be causing these issues.
After selecting an event, Sidekick will guide you through comparing your results to pictures of common network issues. Do your best to answer the questions and by the end of it you should have a good idea of what's going on.
Pro tip!
You can type in a comment at any time. Your comments will be saved in the chat history for you to review at any time.
Solve
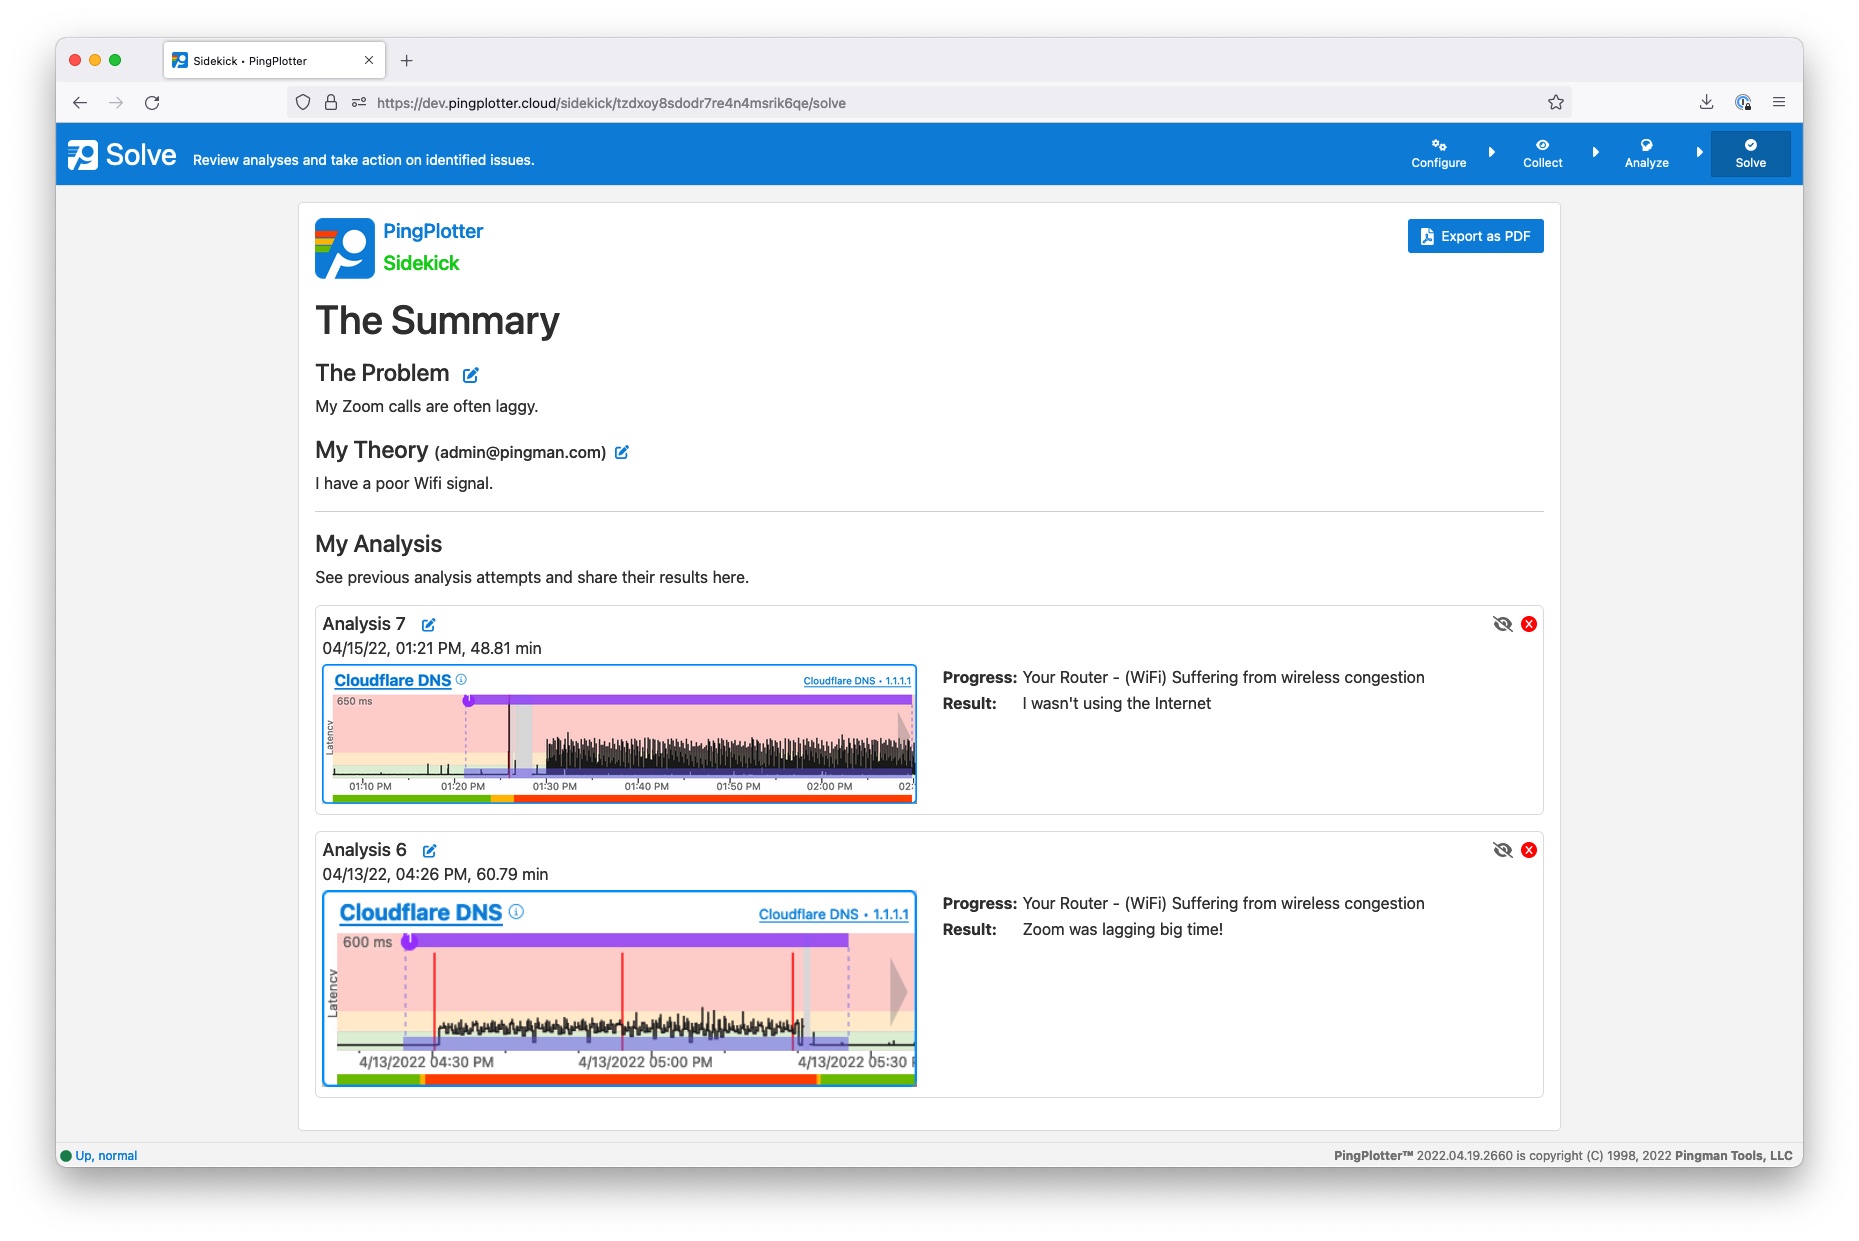
The Solve page is designed to help you review analyses, take action on identified issues, and build a case if the problem ends up being outside of you control. It is a summary of all your hard work.
The Problem
The Problem is the issue you are trying to resolve. This could be buffering while streaming, lag while gaming, or dropped video calls. Whatever it may be, record your problem here by clicking on the Edit icon.
My Theory
My Theory is a place for you to record what you believe is causing the issue. Some possible theories might be: My computer is too far away from my WiFi router or There is high latency on my Internet Service Provider's end.
My Analyses
My Analyses is a record of all of every time you started a new analysis. Edit the name of each analysis by clicking on the edit icon. Review your analysis by clicking anywhere else inside the box.
Pro tip!
If you are building a case to send to your service provider, Hide and Remove analyses that don't support your case by clicking on the respective icons.
Export as PDF
If you find that you cannot resolve this problem, you can create a report to send to somebody else to share your findings. For example, you might find that the issue lies within your Internet Service Providers network. Before reaching out to them, you'd want to build a case with supporting evidence to show where the problem lies.
Check out this article for tips on how to build a compelling case!
