

PingPlotter Cloud Manual
Engine
The Engine settings control what and how PingPlotter sends data.
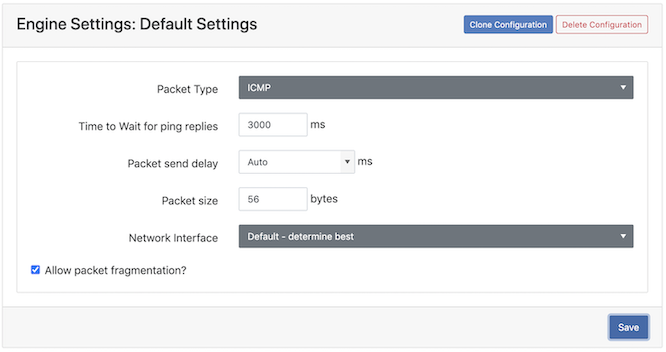
Packet Type
This setting allows you to pick what kind of data packet you want to send to tailor PingPloter Cloud to your network needs. The supported packet types are:
ICMP
- This method is the traditional method and matches the data that the Windows TRACERT command uses.
- Works on all Windows operating systems and is a good balance of reliability and capability; the least CPU usage (on most operating systems).
- This method will automatically do manual timings on less-than-accurate operating systems to attempt to get accuracy to 1ms.
- Does not require administrative rights and should be the first choice for most users.
UDP
- This uses ports 33434 – 33500 and closely mirrors Unix’s traceroute command. This method will sometimes allow you to trace to a destination that isn’t reachable via ICMP or might allow you to reach the internet even if your ISP is blocking ICMP echo requests.
- Though not the cure-all for "Destination Unreachable" issues, this is worth a try, especially if you’re getting erratic packet loss or an unreachable destination.
TCP
- Available for specific use cases. Contact us to enable support (Windows only).
Time-to-wait for ping replies
This option allows you to fine-tune your performance a little. When PingPlotter Cloud sends out a packet, it waits a certain amount of time for a response. The longer it waits, the more resources it needs to use (to keep sockets open), but the more likely that it will get a response.
By default, PingPlotter will wait for 3 seconds for any packet to return. If the packet doesn't return in 3 seconds, then it is counted as a lost packet. If patience isn't one of your virtues, you can turn this down somewhat. No matter what your value is here, timed-out packets will need the time in milliseconds (3000 by default).
Due to the performance enhancements offered by PingPlotter Cloud, compared to its desktop counterpart, it's unlikely that this option needs to be changed. If it's set too low, it can result in misleading data.
Packet Send Delay
This can be an interesting number to manipulate. It's really meant for "advanced" users, so you don't NEED to change it.
PingPlotter Cloud sends out multiple packets at the same time and times everything at once. Actually, it leaves a tiny interval between each packet so as not to completely saturate your bandwidth when it sends out 30 packets from your Agent. This time interval is adjusted by the Packet Send Delay. Most of the time, Auto is good. If you've adjusted your packet size, or your connection to the internet is really slow, you might want to crank this number up a little. If you have just oodles of bandwidth, you can crank it down a little. Be aware that a too-small number can adversely affect how your data is represented.
Packet Size
The size of a packet can make a considerable difference in latency performance. Normally, you want to use a relatively small number here. The default is 56 bytes, but in some cases, you might need to lower this (especially on TCP port 80 packets, which sometimes get dropped unless they are 40 bytes). 1500 bytes is a lot of data and should be used with great care. A 1500 byte packet means that an Agent will be sending out 30-50 K per second worth of data, which can cause its own problems (and makes measuring latency more challenging).
Multiple Configurations
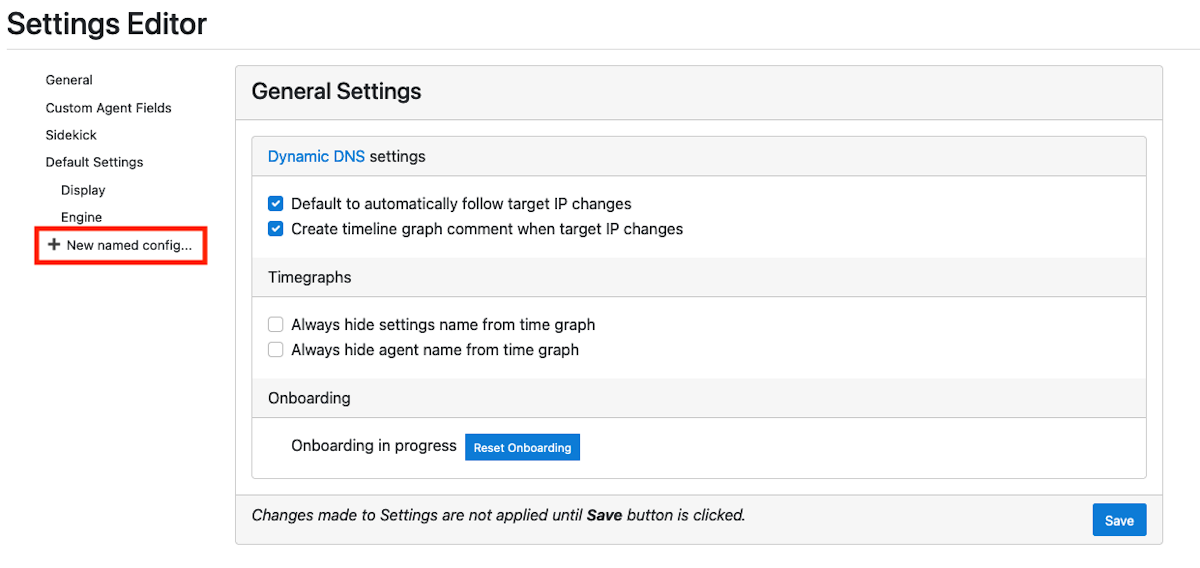
You can create new configurations to use for each individual trace. For example, if you want to use ICMP packets for one trace but UDP packets on another, this is how you would do that.
- Go to Manage --> Settings
- Select + New named config...
- Give this new configuration a name like UDP
- Select Save
- Select Engine below the new name on the left.
- Select the packet type from the Packet Type dropdown, e.g. UDP.
- Select Save
- Make any other desired changes to ports, delay, size, etc.
- Select Save
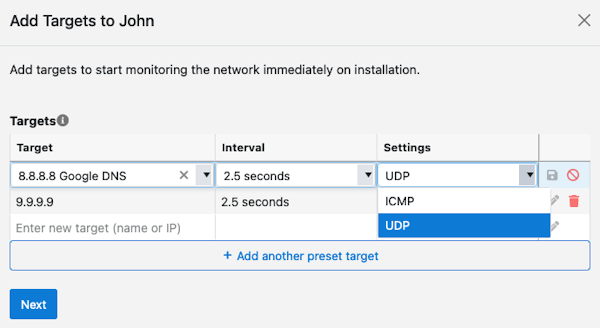
To use this new configuration, select it from the Settings dropdown when adding Targets to the Agent