

PingPlotter Cloud Manual
Vet a Pre-Hire's Network
PingPlotter Cloud can be used to verify that a potential employee's network meets quality standards before bringing them on to the team. This ensures that they will be ready to start working without any issues from day one. This guide will provide step-by-step instructions on how to make this a smooth and efficient process.
1. Create and Deploy the Agent
You first need to create and deploy a PingPlotter Cloud Agent. This will be a small piece of software that is installed on your pre-hire's computer. Here's how to do that:
-
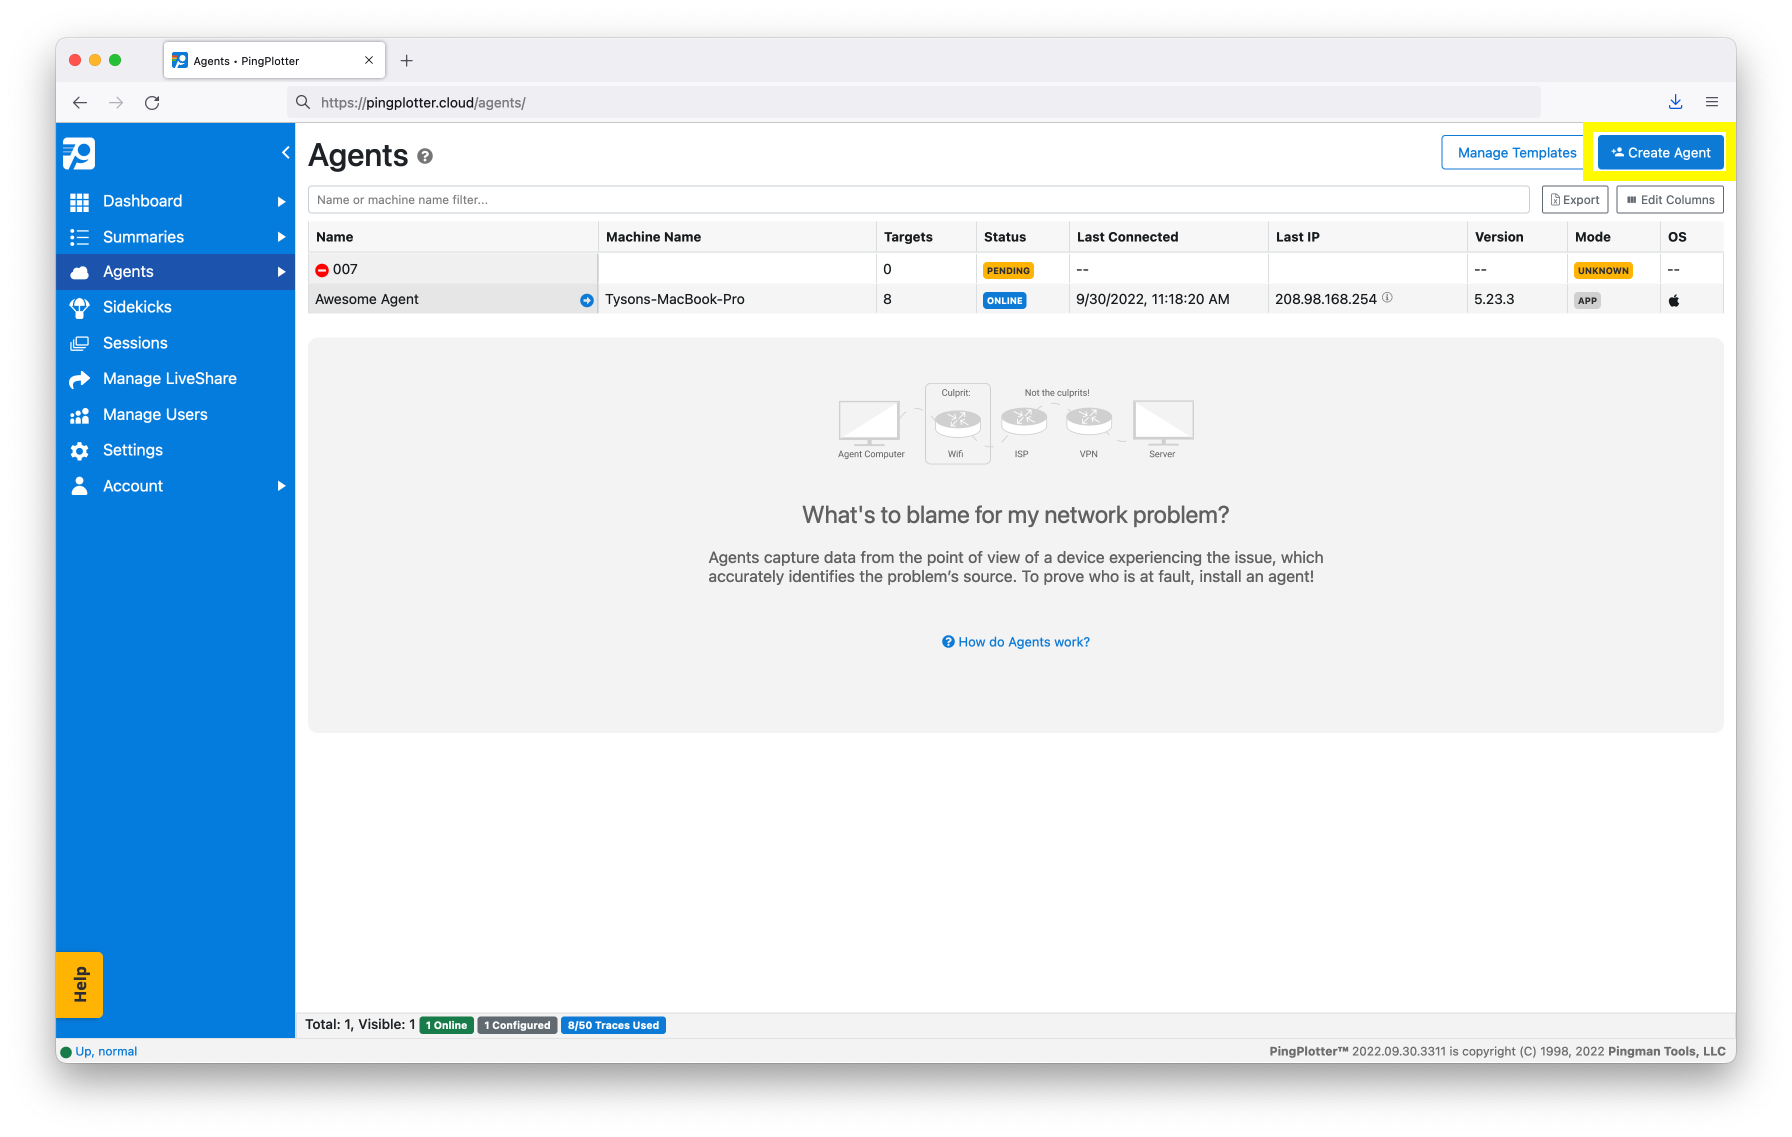
Click on Agents located in the left-sidebar menu.
-
Select Create Agent.
-
Name this Agent using the first and last name of your pre-hire, then hit Create.
-
Add Targets to the Agent. Use the default 8.8.8.8 Google DNS unless you have a specific target to use.
-
Copy the Installer Link and send it to your pre-hire.
The new hire simply needs to open the link, then download and run the Agent Installer. Once installed, the Agent will show as online on your Cloud Dashboard.
2. Collect Data
The Agent will begin collecting data as soon as it is installed and online. We recommend you allow the Agent to collect at least 24 hours of data. Note: the computer will need to remain awake and online.
After 24 hours, it's time to run an analysis.
3. Analyze
Don't worry, you don't need to be a networking expert to analyze PingPlotter data. There's a button that will do it for you:
-
Go to Quality Monitor from the left-sidebar menu.
-
Click on the All Agents card and locate the Agent in the table below.
-
Click on the Agent's name to open the envelope and select View Insights.

Insights will scan the last 24 hours of data, rate the quality of the connection, and identify any issues.
The Signal Quality Summary will tell you what percentage of time the connection was good, fair, or poor. The more good, the better the connection. You want to minimize the amount of time spent in fair or poor.
The Top 3 Events section details anything on the network that could contribute to fair or poor quality. Click on each individual event card to get more details. This is where you will find out if the pre-hire has issues with their Internet connection, be it at home or with their ISP.
4. Share Results

If results came back negative, you can share your results using LiveShare. This will create a read-only link you can send to your pre-hire.
-
Click on the share button at the top of the page.
-
Select LiveShare.
-
Give this a name, expiration date, and some notes. Click Create.
Send the provided link to your pre-hire so they can see their results and take any corrective action if necessary.
Create a Pre-Hire Vetting Dashboard
An easy way to keep track of all of your new hires is to create a Dashboard that only has information related to those Agents you are currently vetting. Here's how you would do that:
Create a Custom Field
You need to first create a Custom Field that will be used to identify which Agents belong to your Pre-Hire group.
Go to Manage --> Settings --> Custom Agent Fields and select Add. Give this field a name. Here are a couple examples:
| Field Name | Values |
| Employee Type | Pre-Hire, Full Time, Part Time, etc. |
| Pre-Hire | true, false |
Now, whenever you add a Pre-Hire Agent, you just need to update this field to the correct Values.
Create the Dashboard
To create a new Dashboard, go to any of your existing Dashboards, click on the three dots next to the title and select Manage Dashboards. Now select either + Create Personal Dashboard or + Create Shared Dashoard. A shared one will be accessible by all users on your account.
Let's delete all of the current widgets on the dashboard. Click on those three dots again and select Edit Graphs. Remove each widget by clicking on the X inside each box.
Now let's create a new widget:
- Click on + Create Widget.
- Select the Detailed Quality Table layout.
- Click + Add a filter.
- Select Employee Type and Pre-Hire (or whatever you decided to use).
- Check the box next to Agent Name, Target Descritption, Graph, Seconds in Poor, Carrier, and any other information you'd like to see about each Agent.
- Select Create.
- Resize your widget if desired and then hit Save at the top of the page.
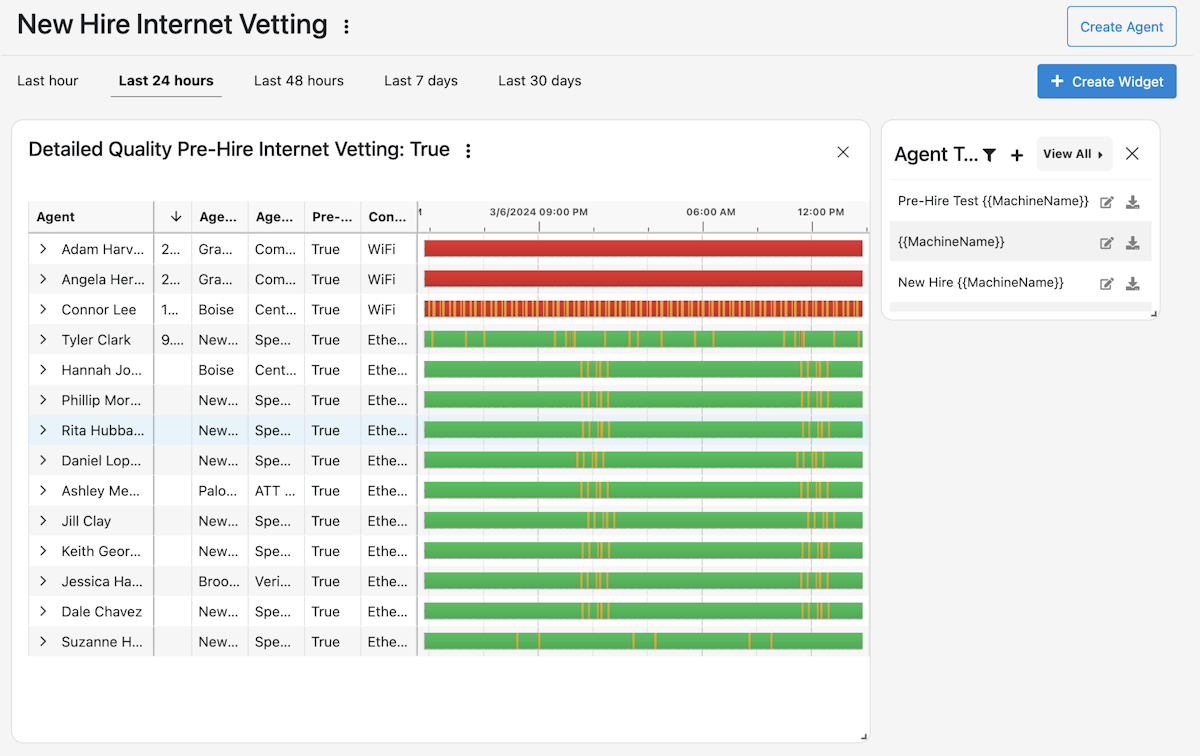
All of your Pre-Hire Agents should populate in the field. When you are done with your test, update the field on the Agent and it will automatically be removed from this list.