PingPlotter Cloud Manual
NetCheck
Note
NetCheck is an add-on feature. Please contact our sales team for more information.
PingPlotter NetCheck allows you to quickly assess network quality for any device and use-case. You choose how long the test will run, the service you're testing (Remote Desktop, VoIP, etc.), and your preferred Target (NetCheck also collects data to Google DNS, the device it installed on, and the user's router). At the end of the test, a report will automatically be generated for you to review. Each test will then need to be marked as pass or fail.
Vet a Pre-Hire's Network
Use NetCheck to verify that a potential employee's network meets quality standards before bringing them on to the team. This ensures that they will be ready to start working without any issues from day one. Do this on a case-by-case basis or for the entire new hire group all at the same time.
Initial Setup
When you first access the NetCheck page, you will need to configure your default settings and create a Template. This Template is a form that your end users will fill out to initiate their test, which can include fields such as first/last name, email, etc.

- Duration - how long the test will collect data.
- Quality Definition - used as criteria for passing or failing a test. (Create a custom Quality Definition)
- Target - for best results, use a publicly avaiable service (like 1.1.1.1 Cloudflare DNS). Note:8.8.8.8 Google DNS is added automatically as a secondary Target.
-
Form and Custom Field Options (Create new custom fields)
- Custom Fields Required on Form - select custom fields that users will be required to complete before starting their test. Use this field to gather information unique to the user (or group of users) that will help you organize the reports. Examples may include area, purpose, manager, job, etc.
- Applied Custom Fields - pre-define values for custom fields. These will be hidden from the end user but will appear on test reports. This is an ideal place to define values that will be the same for everyone in a specific test group. Examples could include Q3 candidates, a specific project name, a particular position, etc.
Hit Update Template Settings when you're ready.These settings can easily be adjusted later for future tests.
Creating and Starting a Test
Using the template

The template is an easy way to create multiple NetCheck tests without having to do it one-by-one. The template link is sent to the end user(s). Those receiving the link will be required to fill out a User Id field (default, always required) and any other fields you defined in the Custom Fields Required on Form section of the template settings.
- Copy the link using Copy Template Link in the upper-right.
- Send this link to anyone needing the test.
- After filling out the required fields, the user will be directed to the Agent download page.
- Once installed, the user will be redirected to the NetCheck page and the test will automatically appear in your In-Progress list.
Creating a Single Test

You also have the option to create a single test and not use the template. This will provide you with a unique link which you will forward on to the end user.
- Select Create Single Test in the upper right corner.
- Give the test a name, like the end user's full name or email address.
- Change any of your default values as needed and hit Create Test.
- (Optional) Choose Custom Fields to which you wish to pre-define values..
- Copy the link and send it to the end user.
The end user will be directed to download their Agent. Once installed, the will automatically begin.
Reviewing a Test
When a test has finished collecting data for the specified duration it will need to be reviewed. Tests needing review will be found in the Action Required tab. Click on the arrow in the Actions column to view the report.
Quality Breakdown

The Quality Breakdown section details how much time the network was in a poor, fair, or good state during active data collection. Any amount of time spent in poor should be reviewed closely.
- Poor - severe issues were detected that interuppted the connection to the specified Target.
- Fair - moderate issues were detected that slowed the connection to the specified Target.
- Good - no issues detected; the connection was strong.
You'll also see the Average Latency, Average Jitter, and Packets Lost (What is good latency, jitter, and packet loss?) . Here's our recommendation of where each metric should be based on the application:
| Application | Latency | Packet Loss | Jitter |
|---|---|---|---|
| Video Conferencing | 150ms | 0.5% | 40ms |
| Voiceover IP Telecommunications | 150ms | 0.5% | 40ms |
| Remote Desktop Connections | 180ms | 0.5% | 20ms |
| Web Browsing | 550ms | 0.5% | 60ms |
Quality Timeline

The Quality Timeline details which category (good, fair, or poor) the connection was in over the course of the test. Keep an eye for blocks of red and/or yellow. Too many of these indicate the user's Internet is not stable enough for the specified service.
Top Timeline Events
These are things that contributed to the fair and/or poor conditions as outlined in the timeline above. Click on the name of the event to get recommendations on how you might go about resolving the issue.
Notes

Use this section to take notes. These will also be visible to anyone else who has the link to the NetCheck test.
Data Details

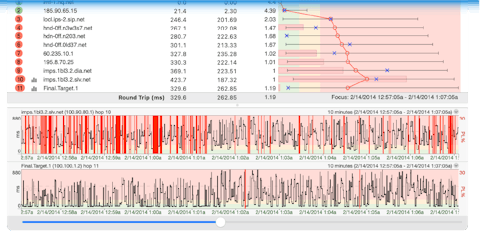
View the classic PingPlotter Timeline graph for each Target in this section. You'll see a graph for your preferred Target, Google DNS, the Current Device, and the user's Router.
The black line plots the latency received for each data point collected. Any red indicates packet loss. Gray periods denote times when data was not collected.
Look for patterns:
- High latency/packet loss in all four graphs indicates an issue with the device where the NetCheck Agent was installed.
- High latency/packet loss in both External Targets and the Router indicates an issue with the Home Network.
- High latency/packet loss in both External Targets indicates an issue with the ISP's Network.
- High latency/packet loss in just your preferred Target indicates an issue with that service.
Passing/Failing a Test
After reviewing the report you'll need to mark this test as passed or failed.
- After reviewing, click on the Action Required dropdown in the upper right.
-
Mark the test as Passed or Failed
- Passed - the test indicates the user's network can adequately perform for the specified service, e.g. make/take phone calls for VoIP.
- Failed - the collected data indicates the user's network does not have a suitable connection for the specified service.
Managing Tests
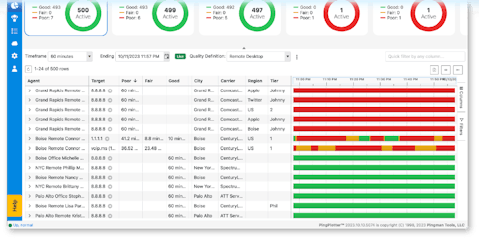
Opening the NetCheck page will land you on a list of all of your created tests: those that are ready for review, in-progress, and have been reviewed. Use the tabs to filter the list of tests:
- Action Required - tests that have completed collecting data and need to be marked as pass/fail.
- In-Progress - tests that are currently running.
- Reviewed - tests that have completed data collection and have been reviewed.
Actions
Under the Actions column you'll find a variety of options:
- Arrow - opens the NetCheck
- Clipboard - copies the end user's link to their NetCheck
- Targets - opens a traditional PingPlotter Summary of that NetCheck's Targets.
- Redeploy - provides the Agent download URL/Auto Setup Link for the NetCheck.
- Pass - marks the NetCheck as passed and move it to the reviewed section.
- Restart - closes the current Targets, starts new ones, and resets the duration timer.
- Fail - marks the NetCheck as failed and move it to the reviewed section.
- Delete - removes the NetCheck from the list and deletes the Agent (and uninstalls if the Agent is currently online).

