PingPlotter Cloud Manual
Cloud LiveShare
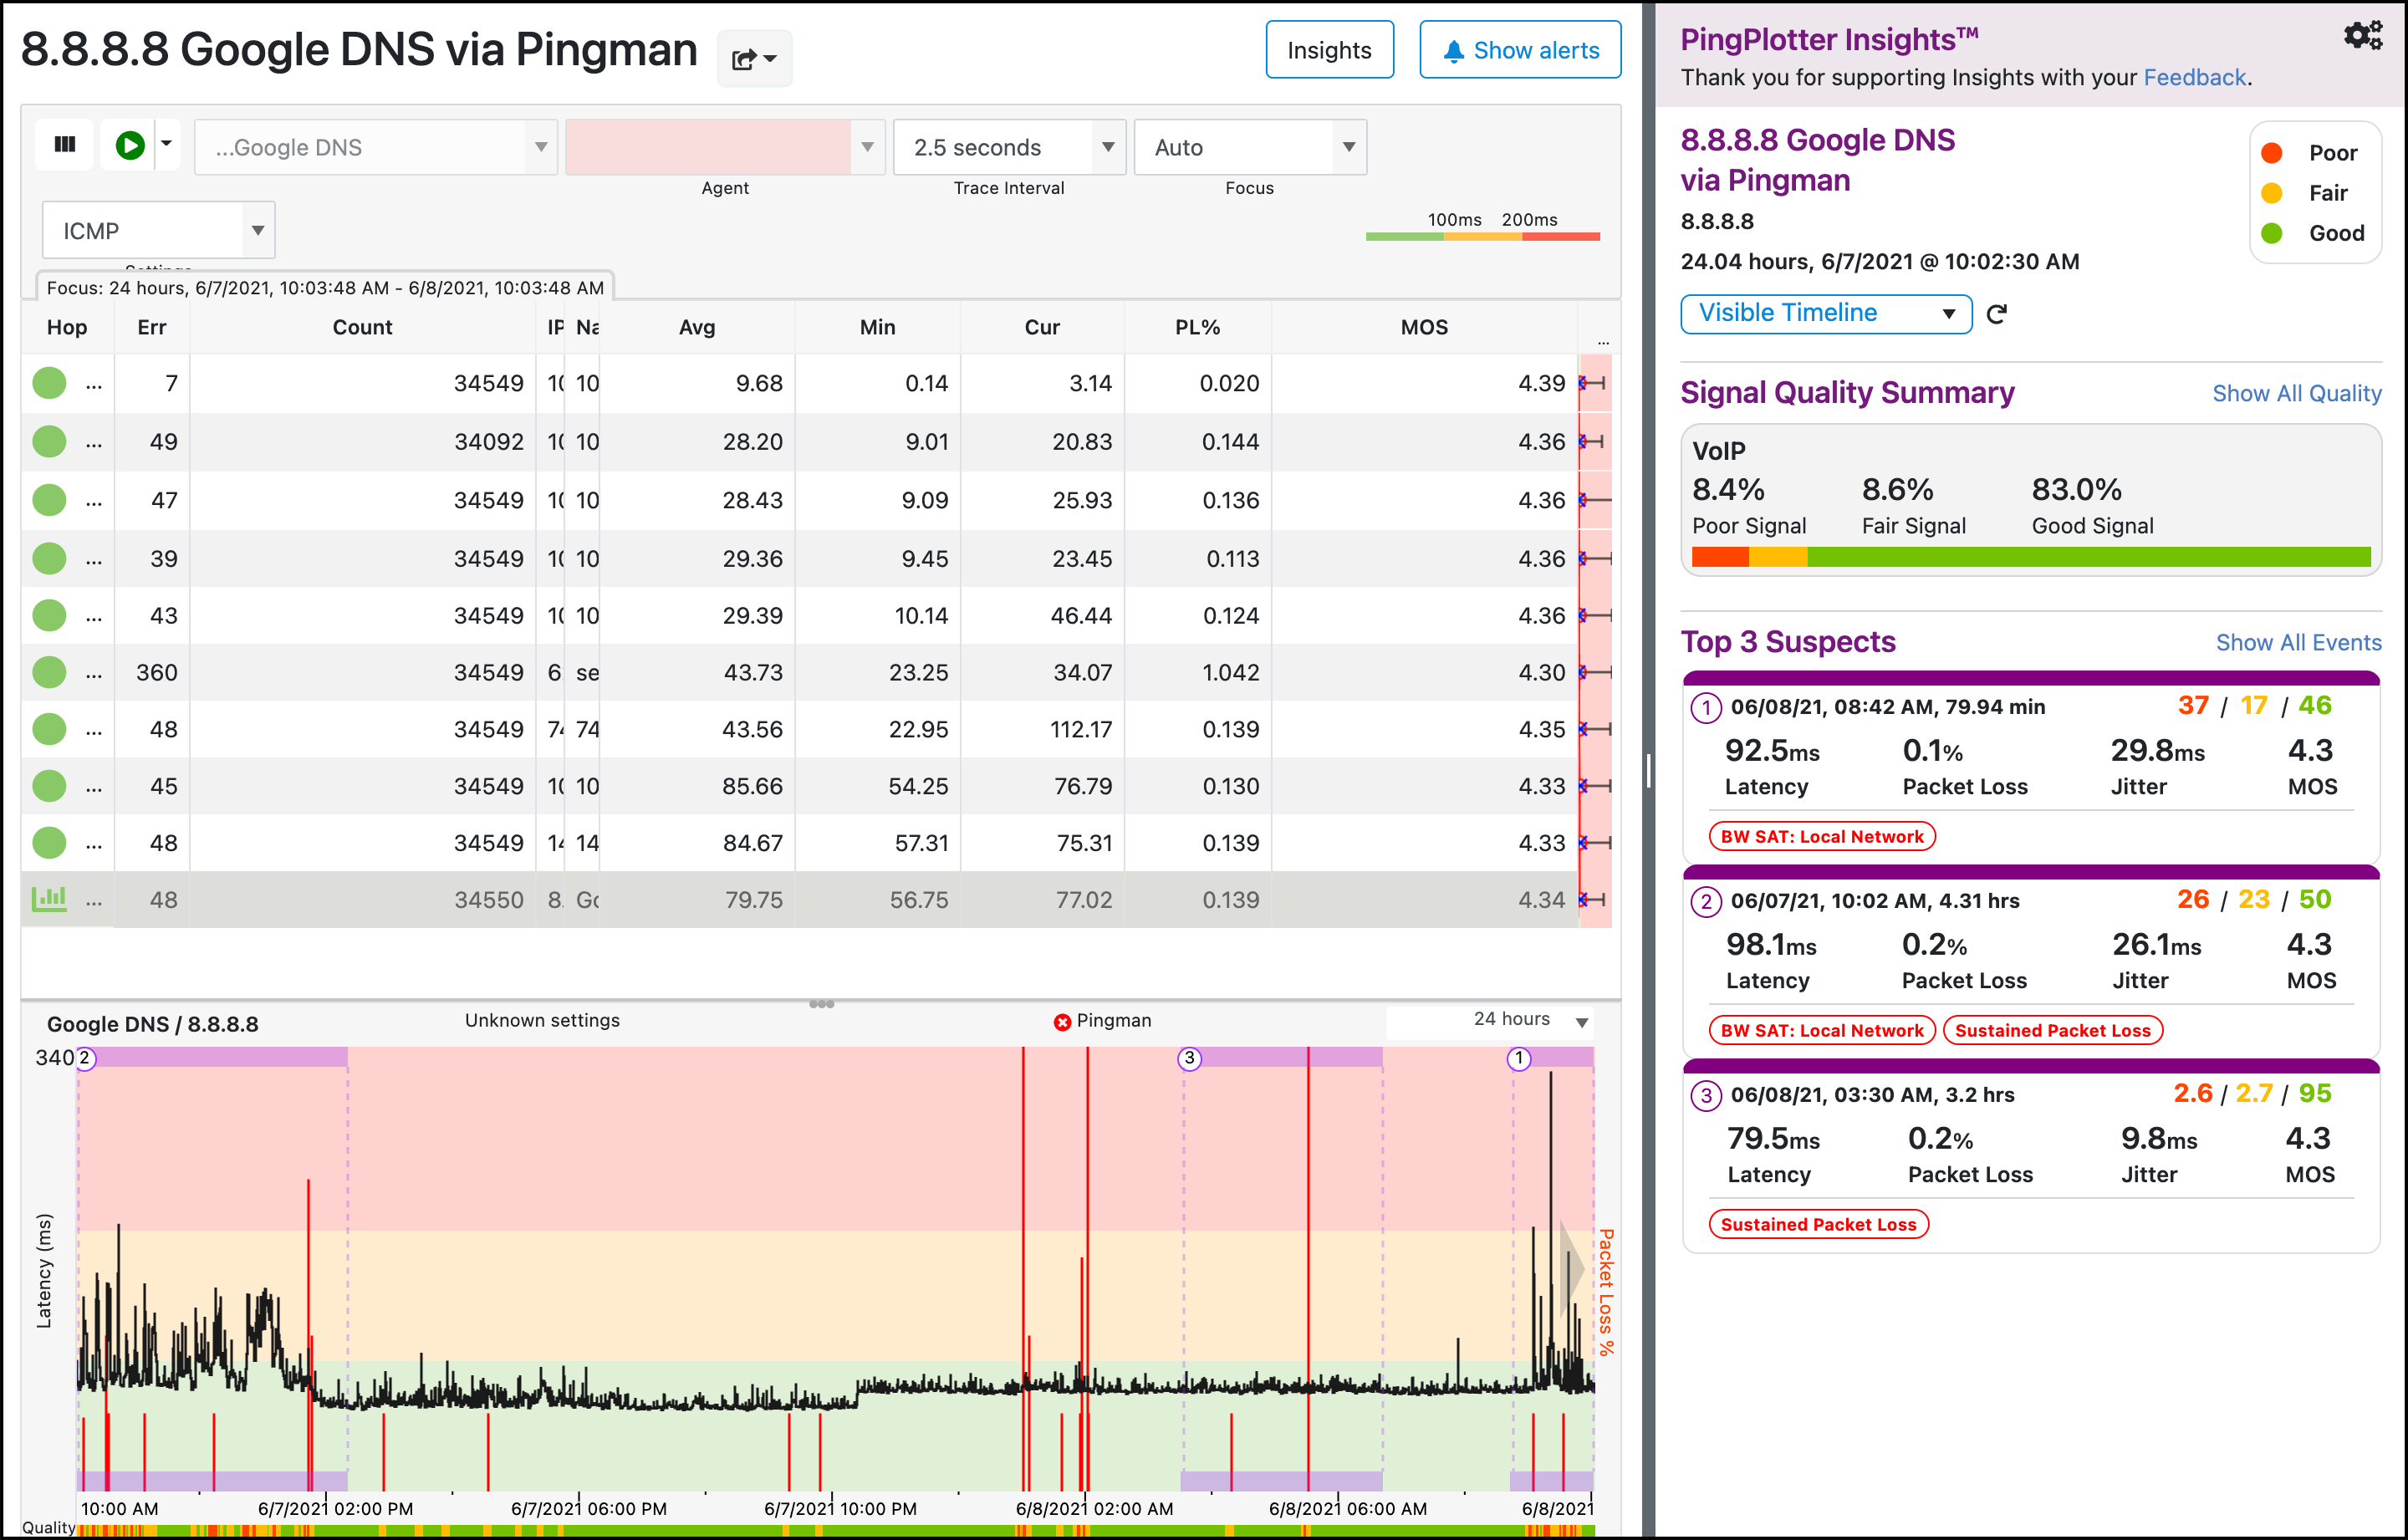
LiveShare links allow permitted users to share web links to live-updating PingPlotter results. The LiveShare link will include any components (Timeline Graphs, Insights, Focus Period, etc.) you have open when the link is created. This allows you to easily share the data and have something concrete that both parties are able to look at and talk about.
Creating a LiveShare link
To create a LiveShare link for the currently-viewed summary or target, set the timeline graph to the range you want to share (or move it all the way to the right for live data), add some components (intermediate timeline graphs, Insights, focus period, etc.), click the Share icon and select LiveShare . A dialog box will appear with settings options for your link. Currently, you can enter a reference name for your link, set an optional expiration date for the link, and add any notes you feel will be helpful for LiveShare link management.
Once you’ve finished modifying your link settings, select Create, and PingPlotter will generate a LiveShare link URL.
When a user navigates to the LiveShare link address, they will be able to view exactly what you were looking at when you created the link. Everything was saved in the URL so if they get lost, they can simply refresh the page to take them back to the original shared view. The user will have read-only access to this data and nothing else until the link expires.

Managing LiveShare links
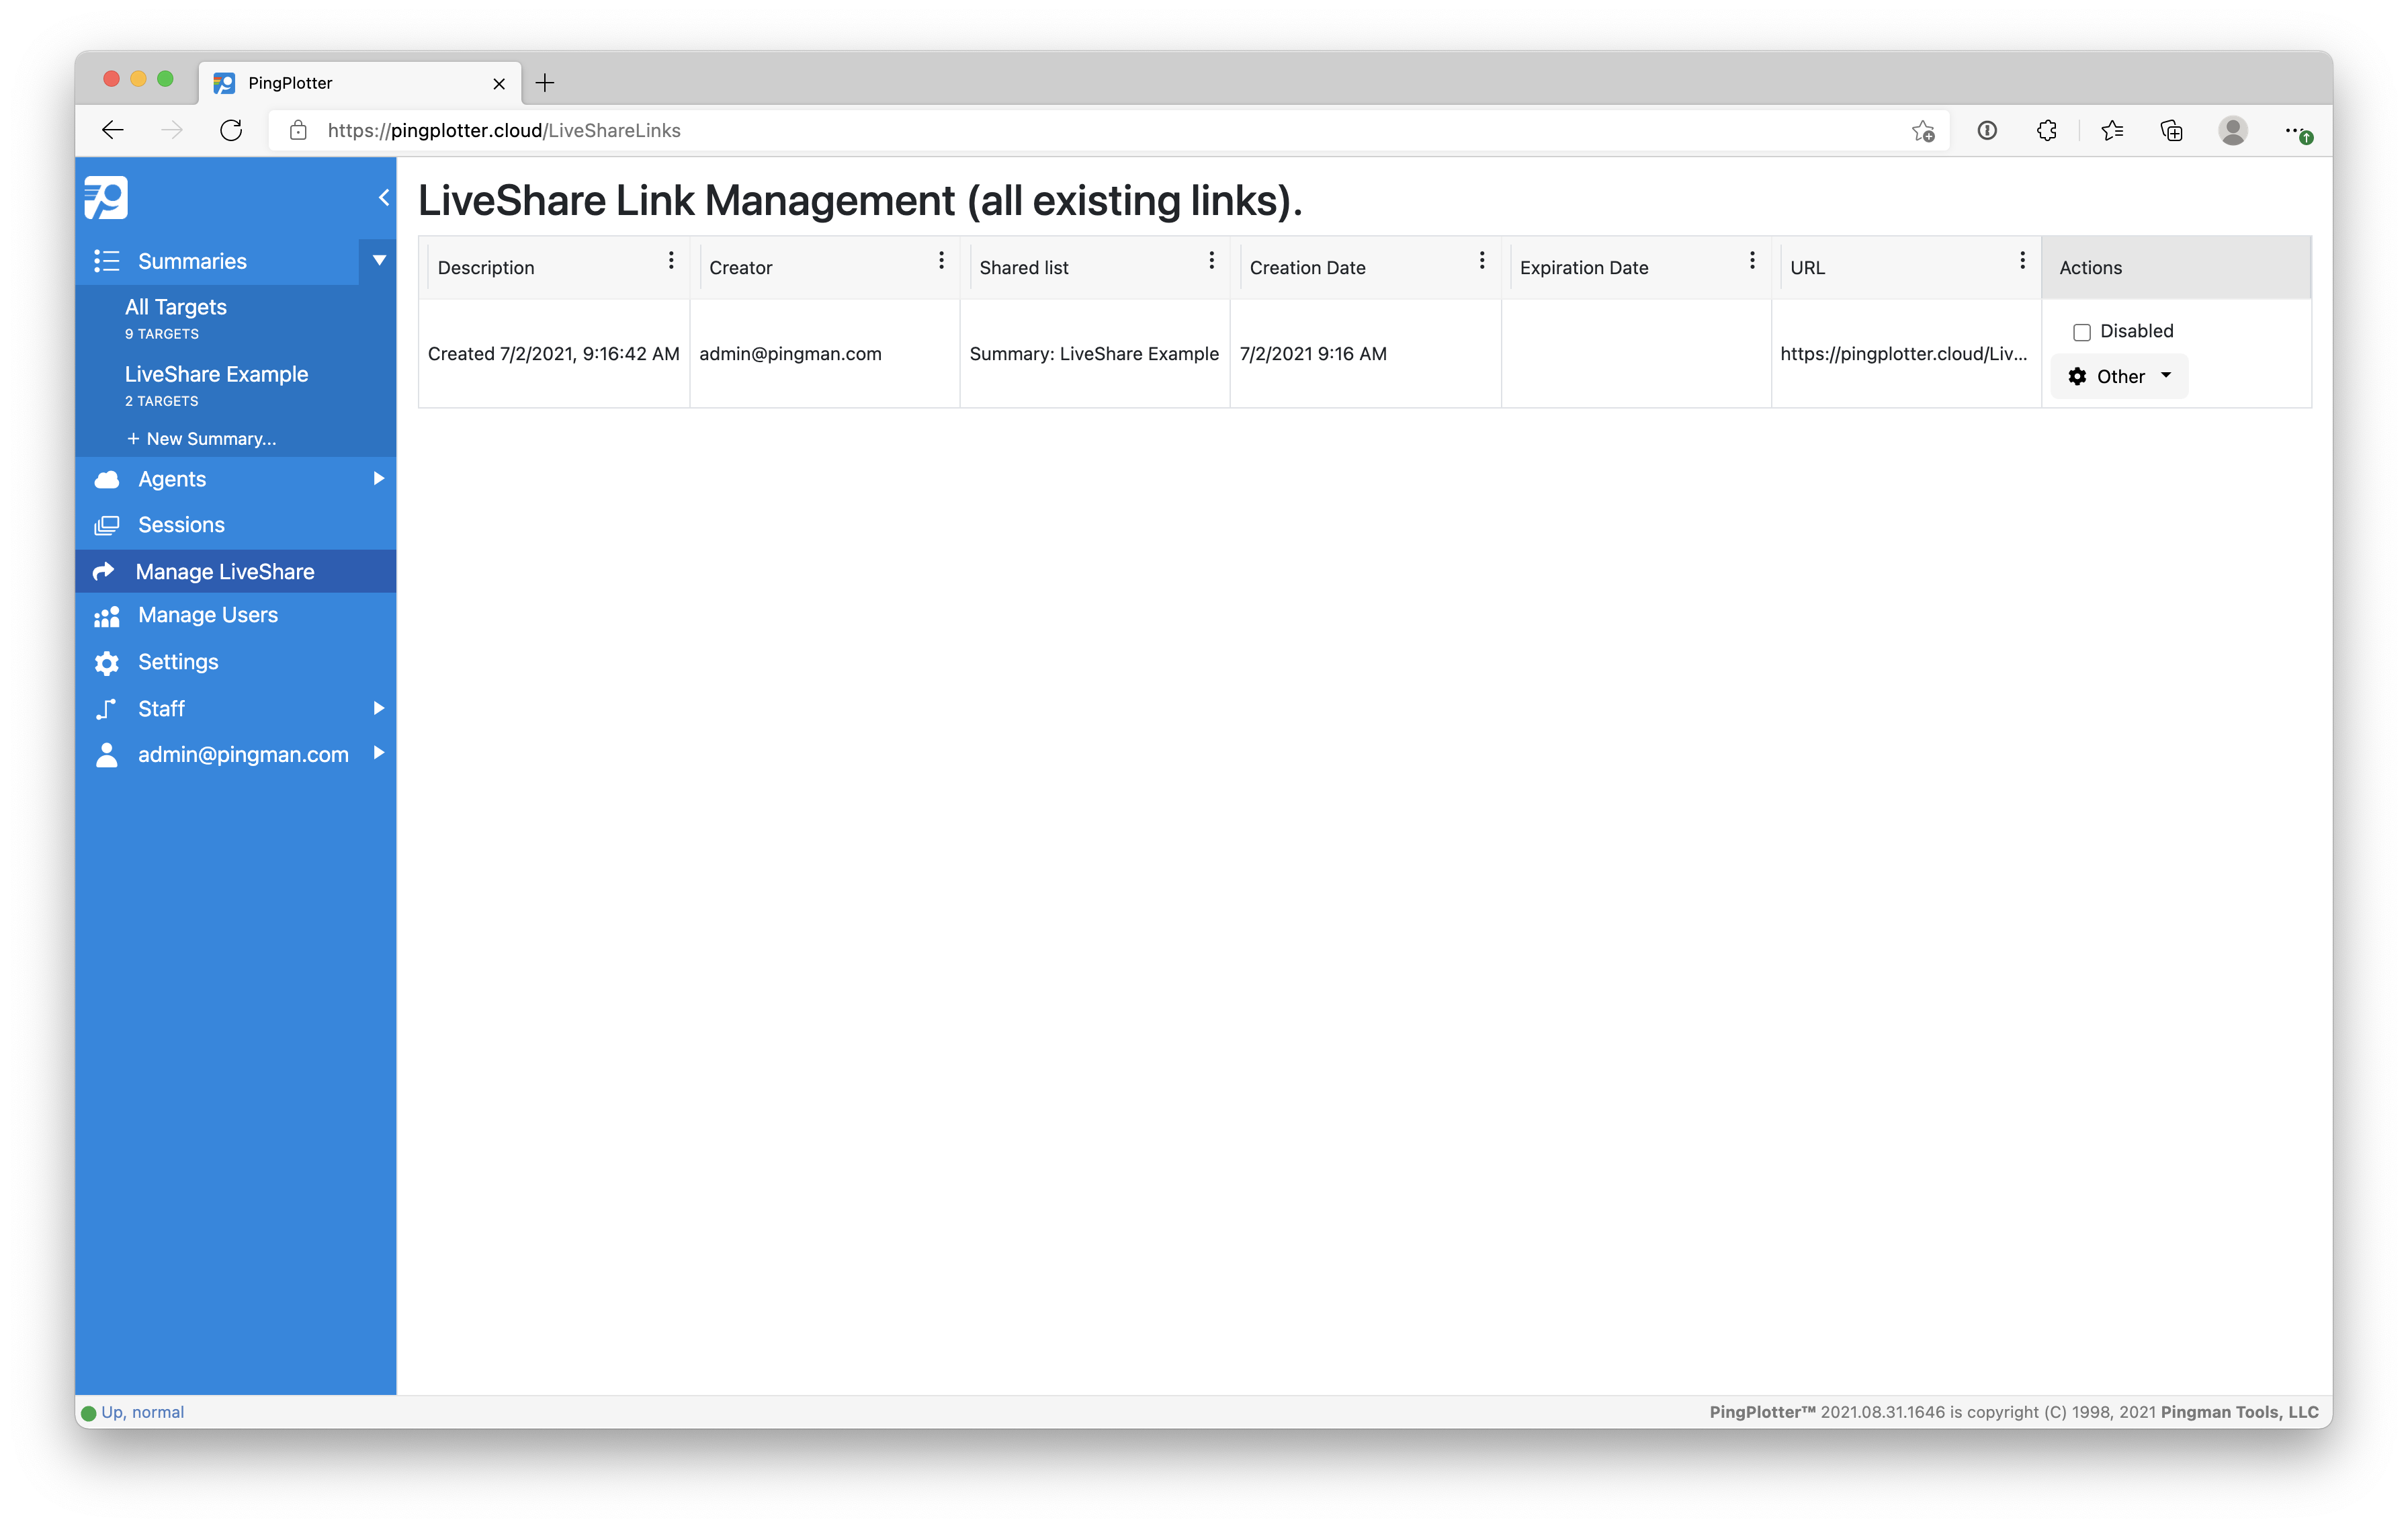
To manage LiveShare links select Manage LiveShare from the sidebar menu. From this screen, you will be able to create, sort, modify, copy, and delete LiveShare links.
The LiveShare link management view is only available to those with the User Management or LiveShare Management privilege. User privileges can be modified from the Manage Users screen.
Take a Snapshot
If you need to attach a hard copy of the data to an email or ticket, then take a Snapshot. Setup the screen just like you did for LiveShare, with all of the components you need to highlight the issue, click the Share icon, and then select Snapshot. A .png image of the data will then be downloaded to your computer. Attach it where it needs to go and then be on your way.