

Version 5 Manual
Overview
Once you've got PingPlotter downloaded and installed, starting to collect data is a breeze.
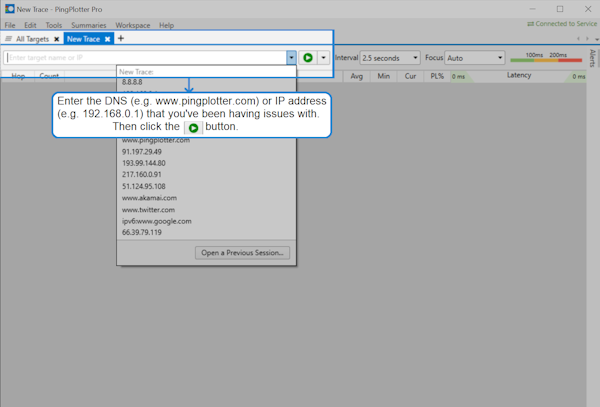
PingPlotter will then begin to generate route information. If you're getting a "Destination address unreachable" message - have a look here for some possible solutions.
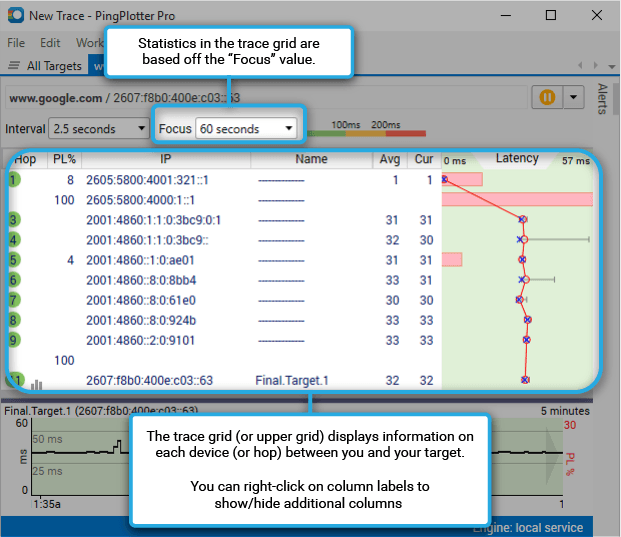
Worried about the packet loss that you see at hop #4 and #10 in the above screen shot? As long as it doesn't seem to be affecting our final destination (which it isn't here) - then it's nothing to worry about. See this Knowledge Base article for more information.
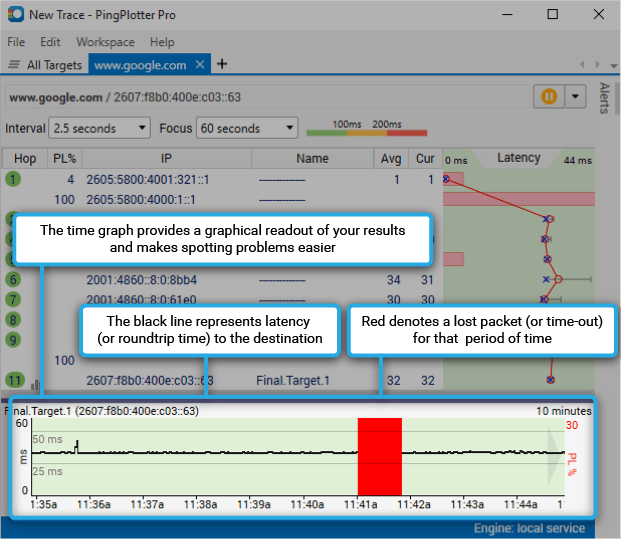
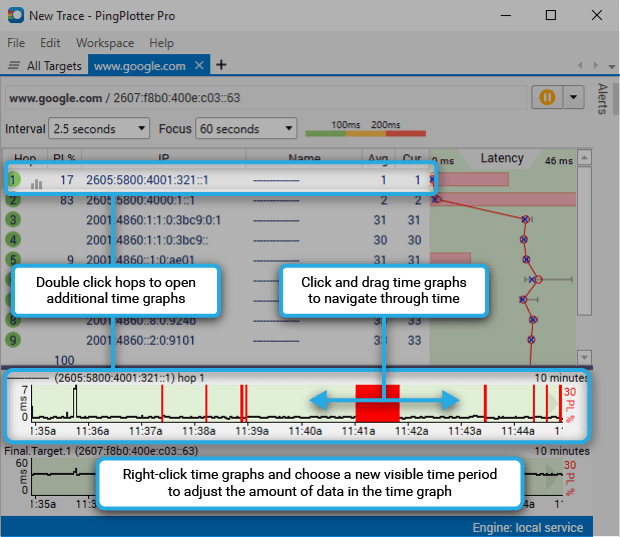
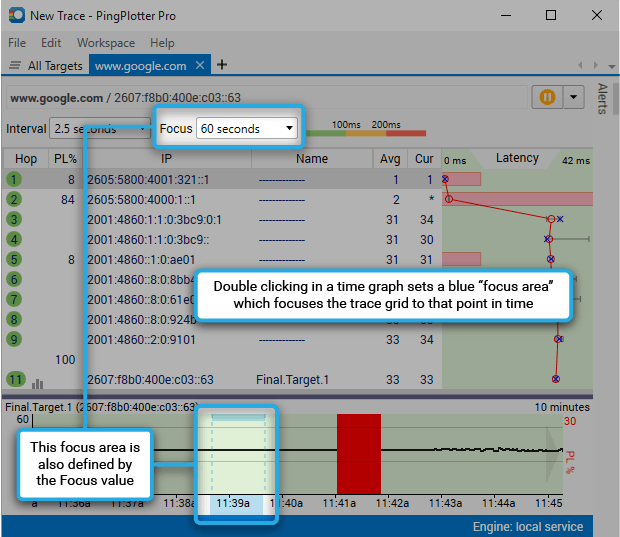
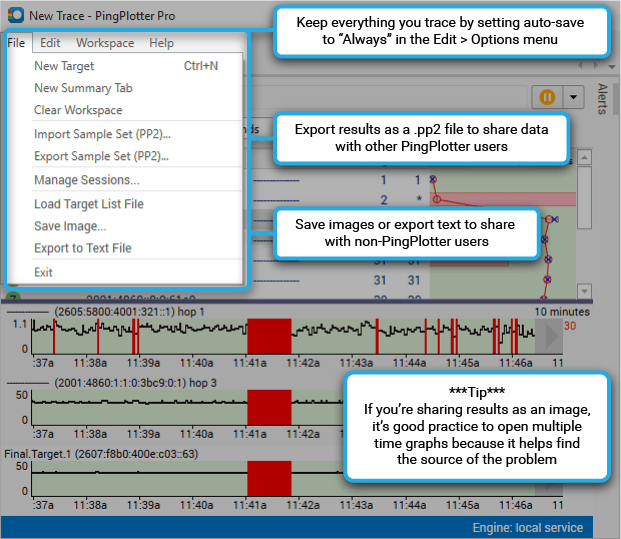
**Some of the features listed in this topic are only available in PingPlotter Pro and/or PingPlotter Standard. See our product comparison page for more details**