

Version 5 Manual
Email Setup (for alerts)
Important!
To help keep your account secure, most email providers (Google, Microsoft, Apple) no longer support the use of third-party apps or devices which ask you to sign in to your account using only your username and password. You will to need to create an App Password. This is also true for any accounts where 2FA is enabled. Please see this article in our Knowledge Base for more details.
The process of setting up an email alert is mostly the same as setting up any other alert, with a few exceptions. The first big difference is that we'll be asked to configure email settings before setting up any other part of the alert.
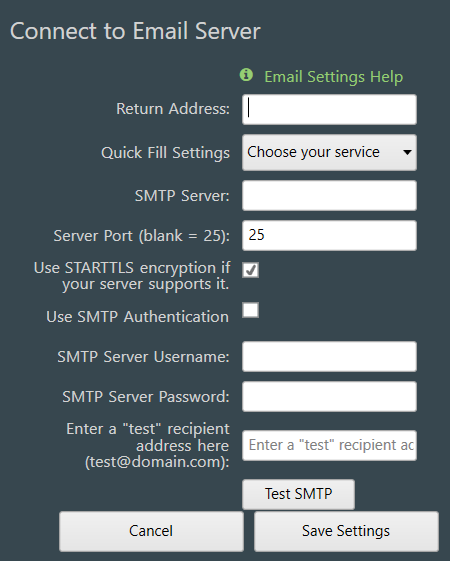
If we're using a common email carrier (Gmail, Outlook, Yahoo, etc), we can use the "Quick Fill Settings" dropdown to automatically enter the correct SMTP server name, and port. Once we've filled everything here out, we can send a test message to make sure we've gotten everything correct - we'll just enter our email address in the last field on this screen (where it says "enter a "test" recipient address here") and click on the "Test SMTP" button. If all goes according to plan, we should receive an email in our inbox letting us know that we're good to go!
On the screen for step 2, there is an option to edit our email setup if we need to make some adjustments (just click on the "Email Setup" icon).
Next we'll need to set up our notification preferences and choose the address (or addresses) we'd like to send the alert email to. If we need to send the email to multiple people, we can enter multiple addresses in the "email recipient" field, each one separated by a comma.
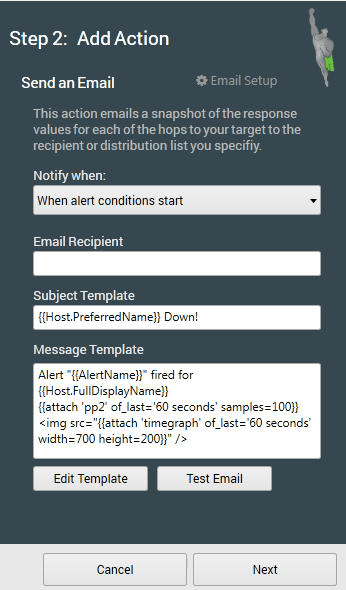
We can also edit the body of the email that's sent by clicking on the "edit template" button. This will launch a template editor that will provide several different options for what to include in the body of the email.
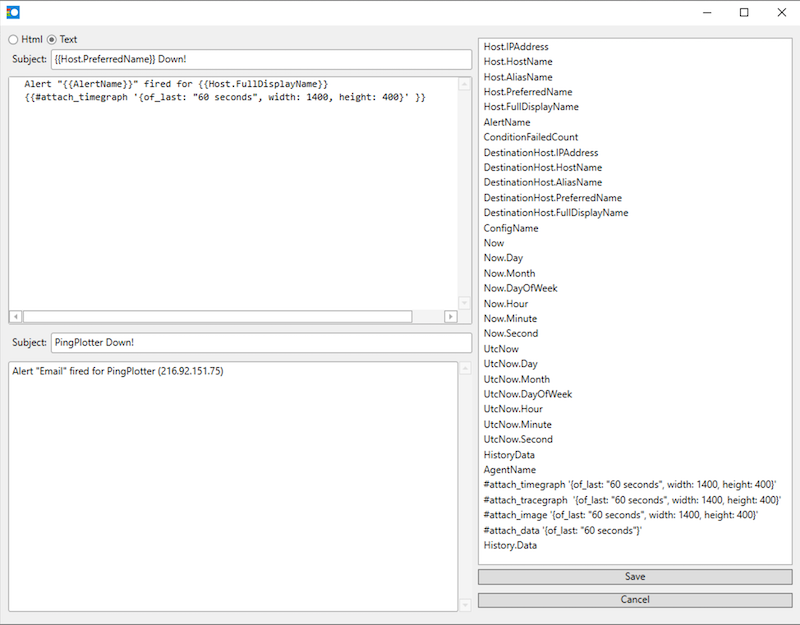
Here you can choose from several different options on what to include in the body of the email, and configure it in either HTML or plain text format. Once everything is set up, we can click the "save" button and send a test email to make sure that everything looks like we want it to.